 |
| New Module Rights in System Role for Approval |
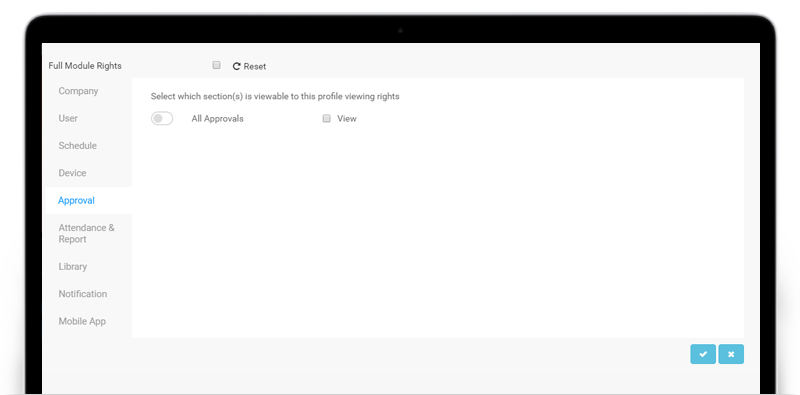
| The first update is especially for the management of Overtime, Edit Attendance and/or Out of Area Clocking requests. If your company uses this feature, you can now set the viewing rights for Admins to either allow them to view all requests that falls under their division (regardless of who needs to approve) or only requests that actually requires their personal approval. |
| Please refer to the screenshots below for more information. a. Manage System Roles & Admin - Added Module Rights for Admin to view all Approvals |
 |
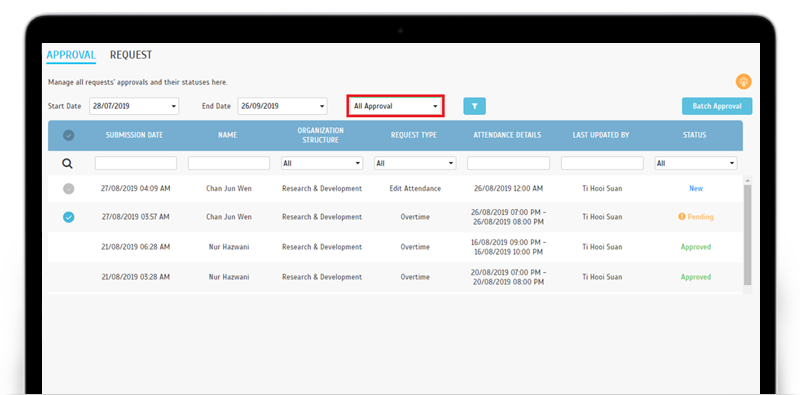
| b. Approval page- Added filter for viewing ‘All Approval’ and ‘My Approval’ |
 |
| Approval- Support Batch Approval |
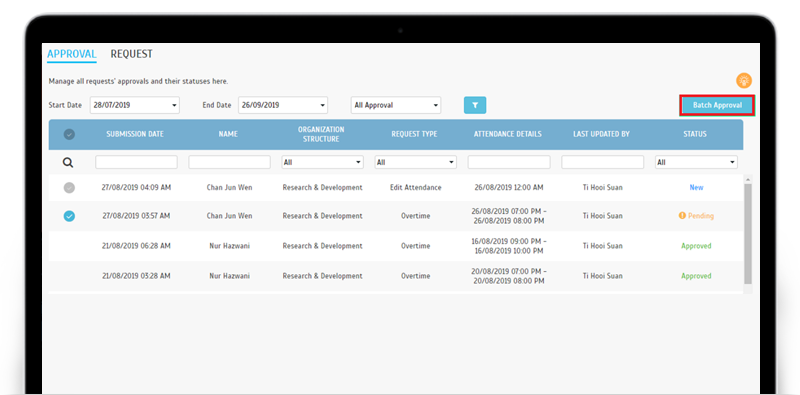
| This next enhancement is also for Approvers of Overtime, Edit Attendance and Out of Area Clocking requests. In order to speed up the approval process, we’ve recently added a Batch Approval function at the Approval page. This will allow Approvers to approve multiple requests at once, instead of going into each individual form. Just mark the relevant checkbox (first column) next to users’ name and click the ‘Batch Approval’ button to proceed. |
| Please refer to the sample screenshots below for further details: a. Batch Approval button |
 |
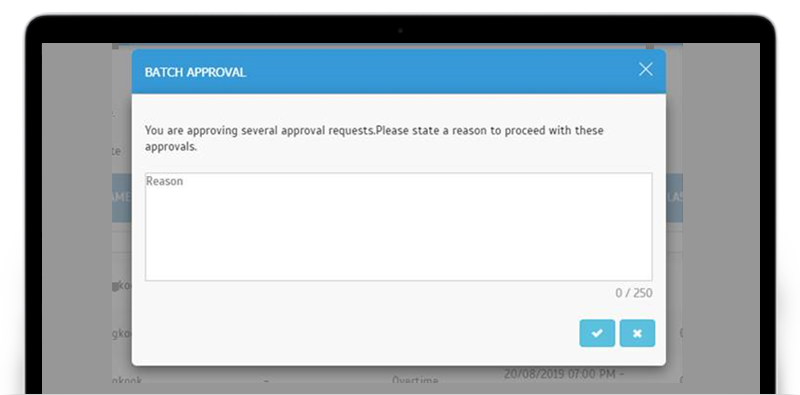
| b. Batch Approval Pop-up Pop-up will be displayed after clicking the Batch Approval button for Approvers to state reason. |
 |
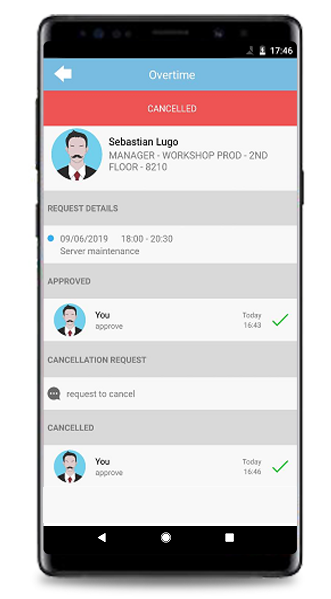
| Allow User to Request Cancellation in Approval |
| Within the Approval module, we’ve also added a cancellation option for requests that are pending or that have already been approved. Both Approver and User can initiate the cancellation. Refer to below for examples: |
| a. Cancellation from Admin View |
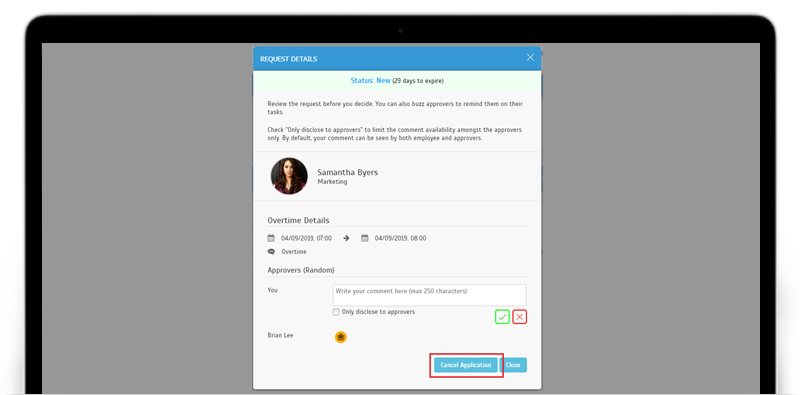 |
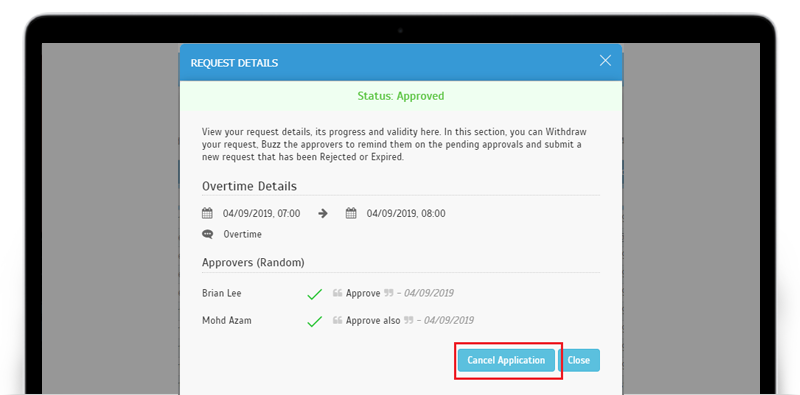
| b. Cancellation from User View |
 |
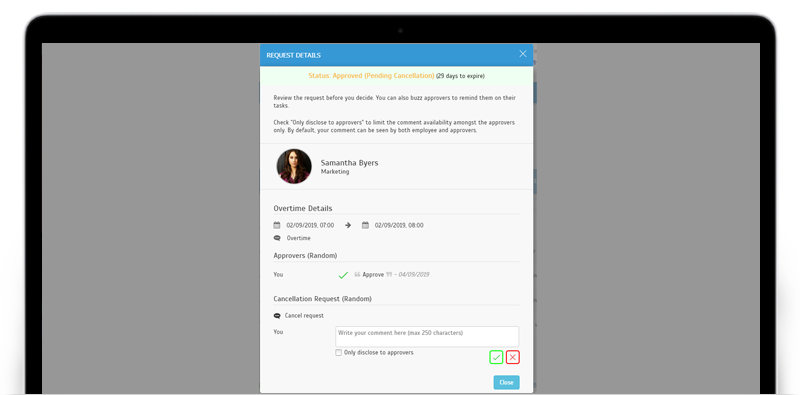
| c. New Request Statuses i. Pending Cancellation |
 |
| ii. Approved (Pending Cancellation) |
 |
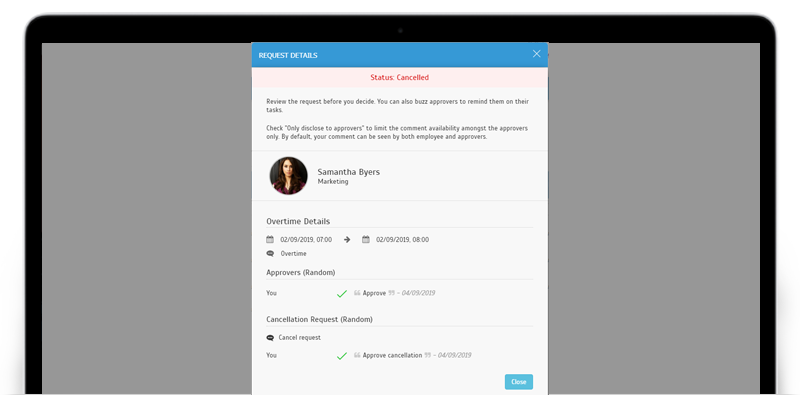
| iii. Cancelled |
 |
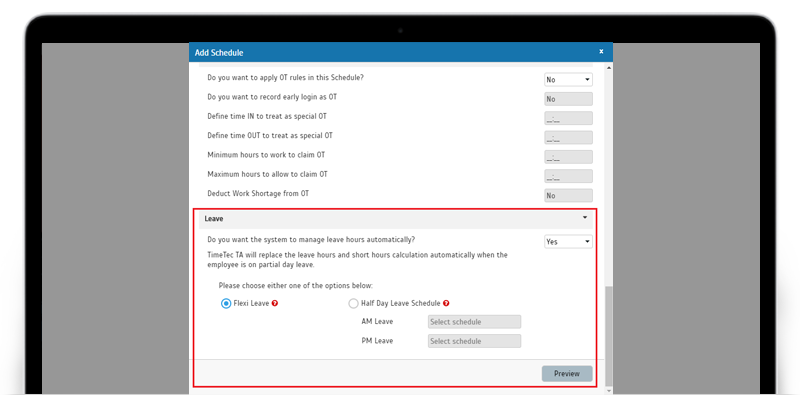
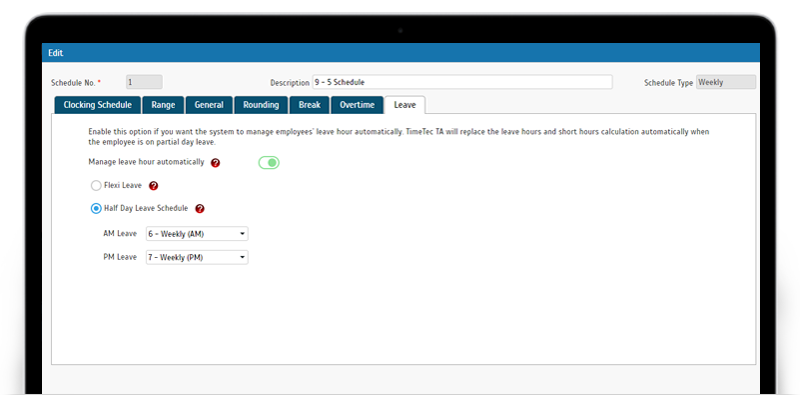
| Advanced TimeTec TA and Leave Integration- Manage Leave Hour Automatically |
| This next update is regarding the management of Half day leaves in both TimeTec TA and TimeTec Leave for those that subscribe to both solutions. In TimeTec Leave, there is a setting that caters for Half day leaves, where Admin can preset the default start time for half day leaves in the system, for both AM (First half) and PM (Second half). The staff can then apply for either AM or PM and take their time off according to the specified hours. Meanwhile, in TimeTec TA, since they’ll be working for only half the hours of their usual Clocking Schedule, these leaves also need to be accurately reflected in the Attendance Sheet and Reports. Otherwise, you will see short hours when that is not the case. Therefore, in September, we’ve released a new option in Clocking Schedule which helps to integrate the details in both systems and manage leave hour automatically. When the setting is enabled, TimeTec TA will deduct short working hours with leave hours or re-assign a half day schedule automatically to cater for the half day leave application in TimeTec Leave (AM/ PM). |
| Please refer to the sample screenshots below for further details: a. Schedule > Clocking Schedule > Add Schedule- Manage Leave Hour option |
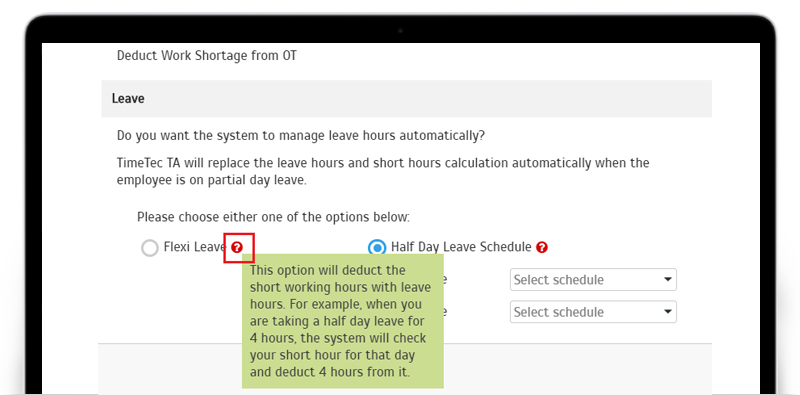
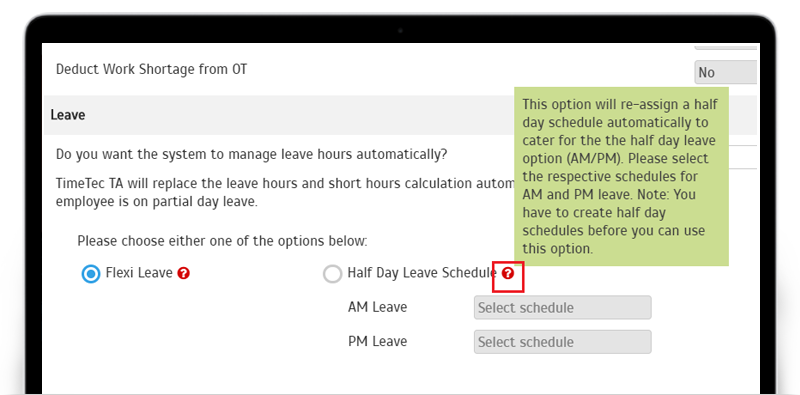
| Select ‘Yes’ from the dropdown to enable. There are 2 options:
i. Flexi Leave ii. Half Day Leave Schedule (only displayed if half day option is also enabled in TimeTec Leave) |
 |
 |
 |
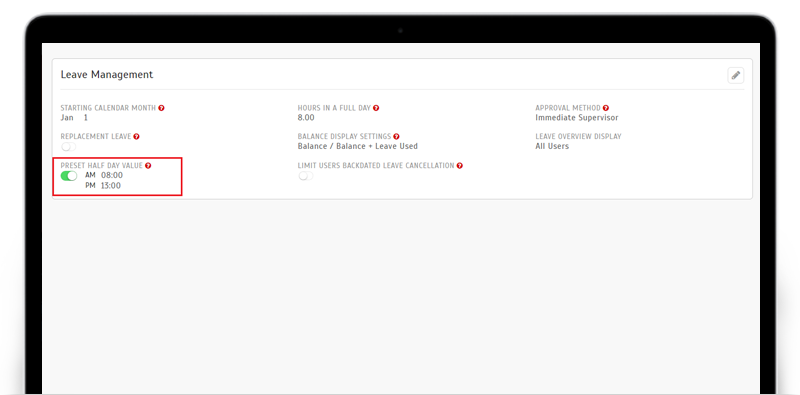
| b. TimeTec Leave > System Settings> Leave Management - Enable Half Day Leave |
 |
| c. Manage Leave Hour options when Edit Schedule |
 |
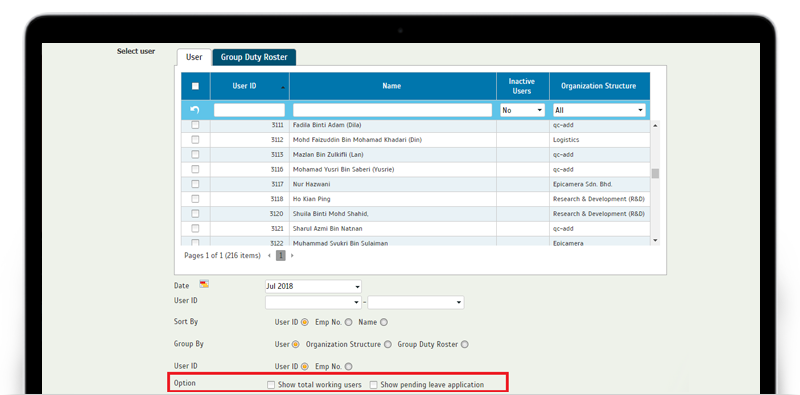
| Monthly Staff Duty Roster Report Enhancement |
| a. Added “Show pending leave application” and “Show total working users” options |
 |
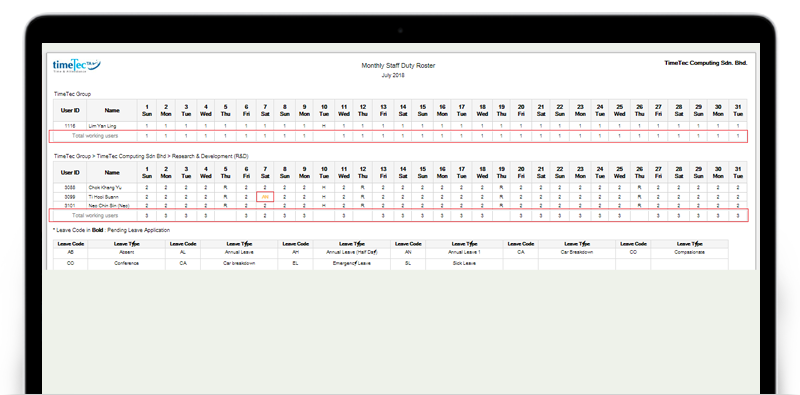
| b. New Monthly Staff Duty Roster Report Shows total working users and pending leave application |
 |
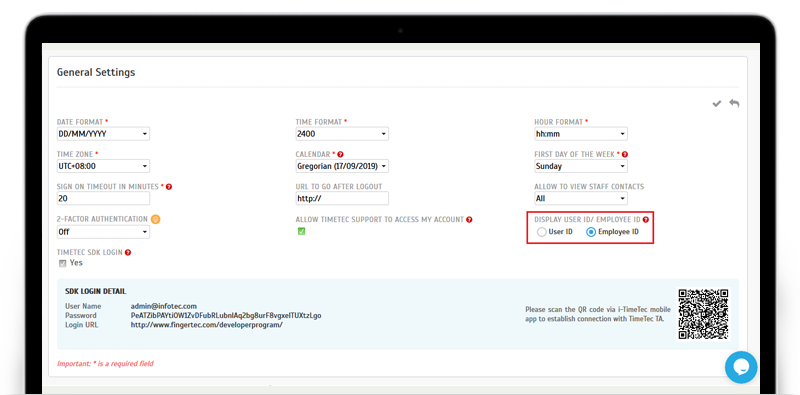
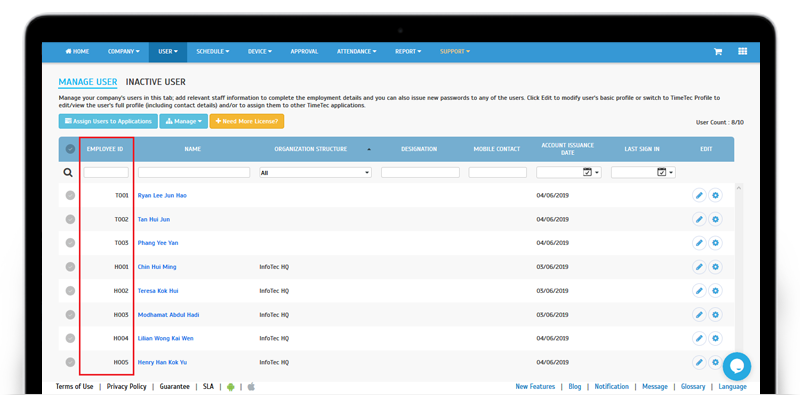
| System Settings- New Option to Display either User ID or Employee ID in Listings |
| By default, the primary user identification throughout TimeTec TA is User ID. However, we’ve recently added a new function at System Settings which allows you to choose Employee ID instead of User ID. The changes will affect display in some of the modules such as Organization Structure, Profile Field, Manage User, Inactive User, Hierarchy and more. |
| a. Company > System Settings > General Settings- Display User ID/Employee ID Added setting for Admin to decide whether to view User ID or Employee ID |
 |
| b. Affected Modules These tables in these modules will display Employee ID instead of User ID if set by Admin: i. User > Manage User |
 |
| ii. User > Manage User > Assign Users to Applications |
 |
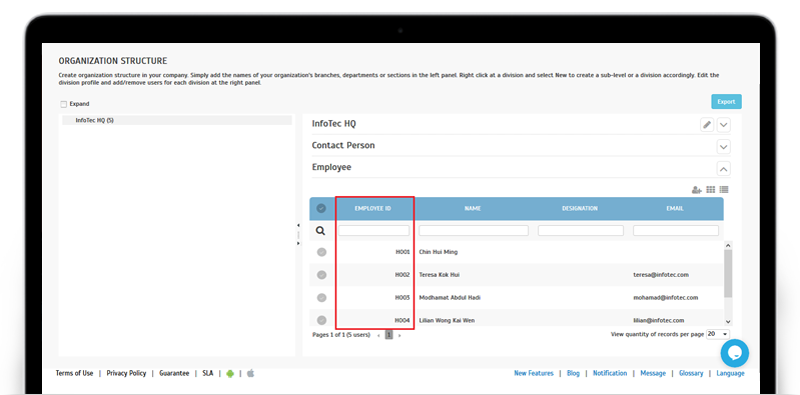
| iii. Company > Organization Structure |
 |
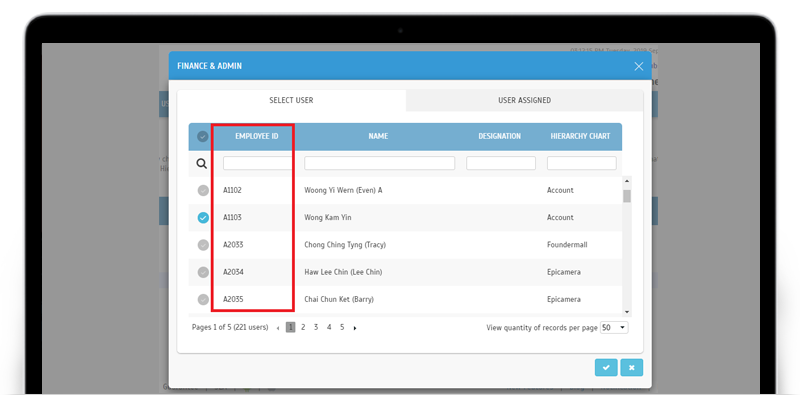
| iv. Company > Profile Field > Assign Users |
 |
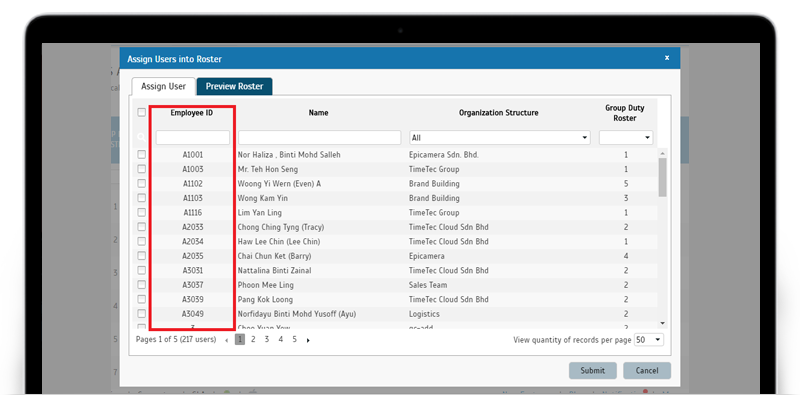
| v. Schedule > Assign Schedules and Users into Roster |
 |
| vi. User > Hierarchy Chart |
 |
| TimeTec Profile Updates |
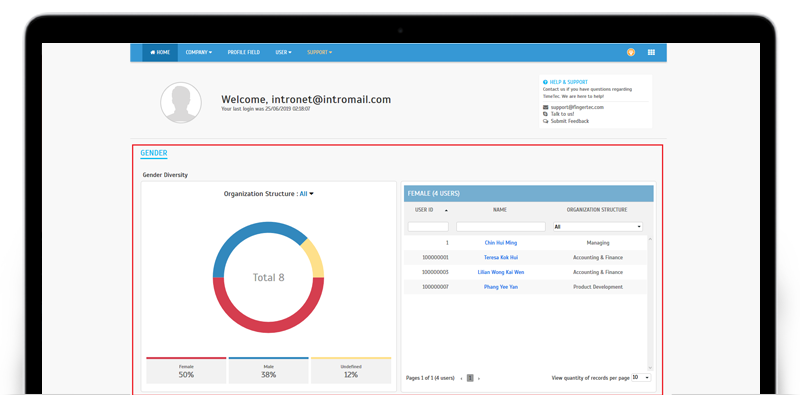
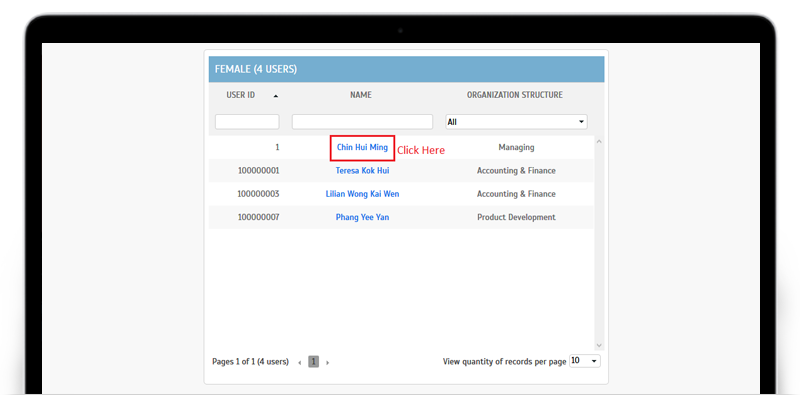
| 1. Admin Dashboard- New Gender Report To help you keep track of employment diversity and inclusion efforts in your organization, we’ll be introducing a few charts on TimeTec Profile’s Admin dashboard. It’s scheduled for release in these few months and the first chart is out: the Gender Report which tells you the percentages of different genders available in your organization. This chart is an indication of recruitment pattern, and you can start from there to adjust on the percentage as you move forward. |
| a. Pie Chart & User Listing |
 |
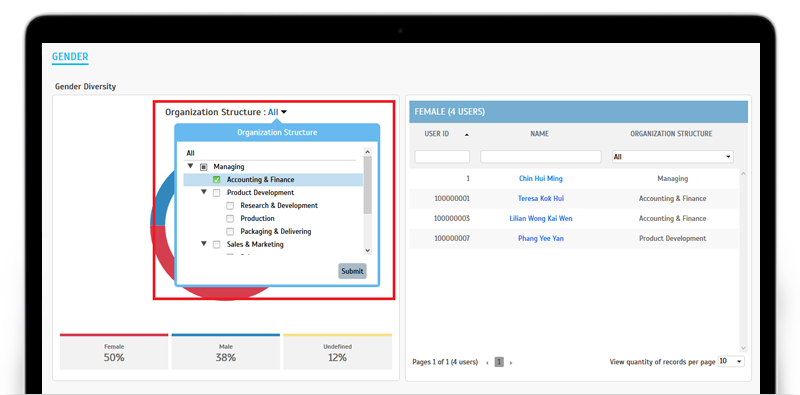
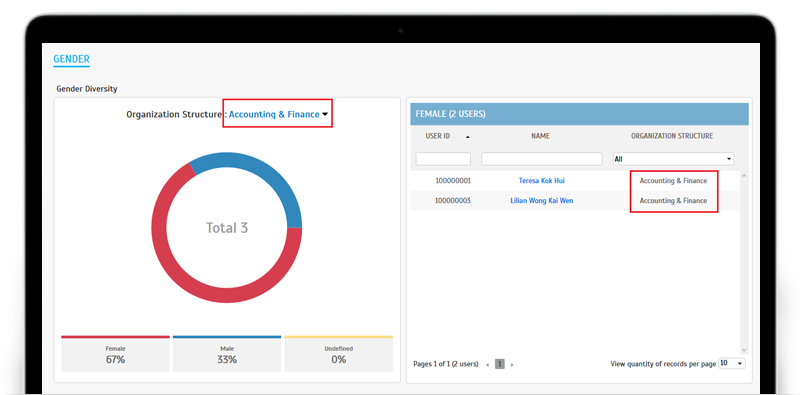
| b. Report can be filtered by Organization Structure |
 |
 |
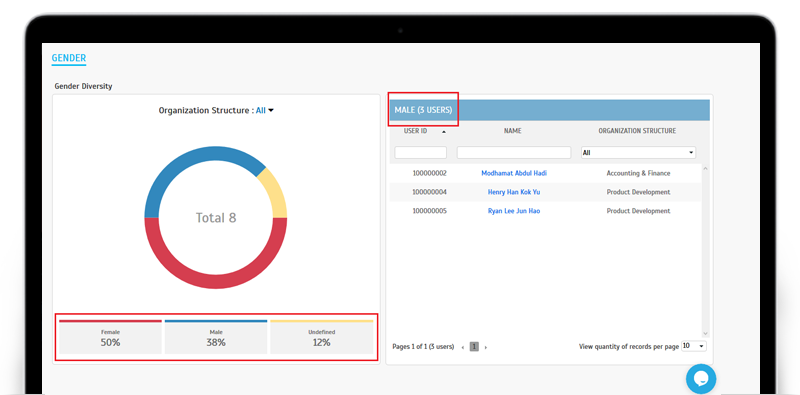
| c. Report can be filtered by Gender from the Gender buttons below the pie chart |
 |
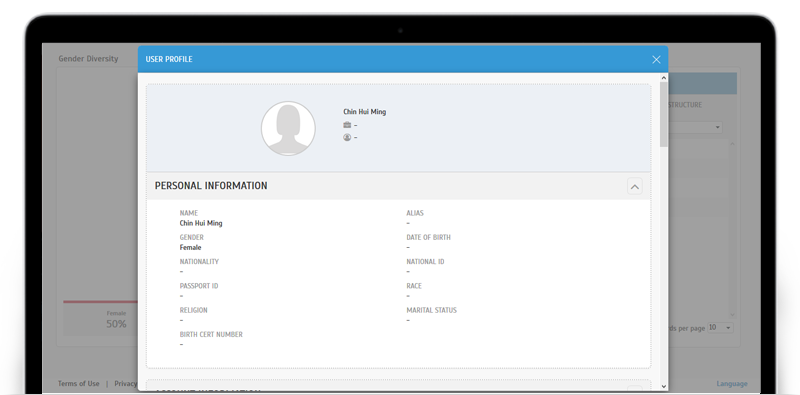
| d. User profile can be opened by clicking on the user name |
 |
 |
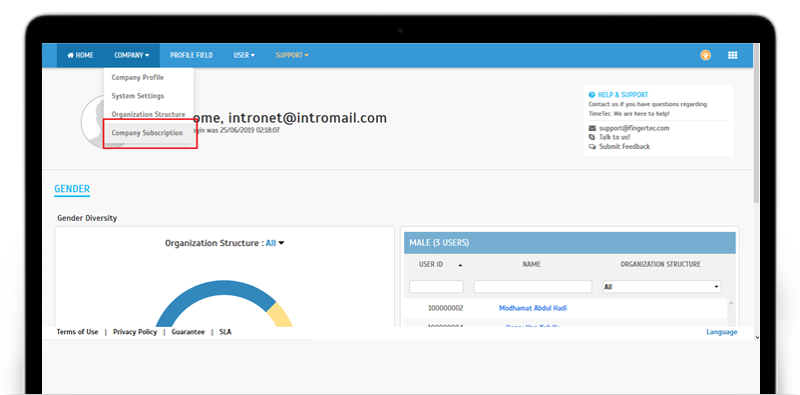
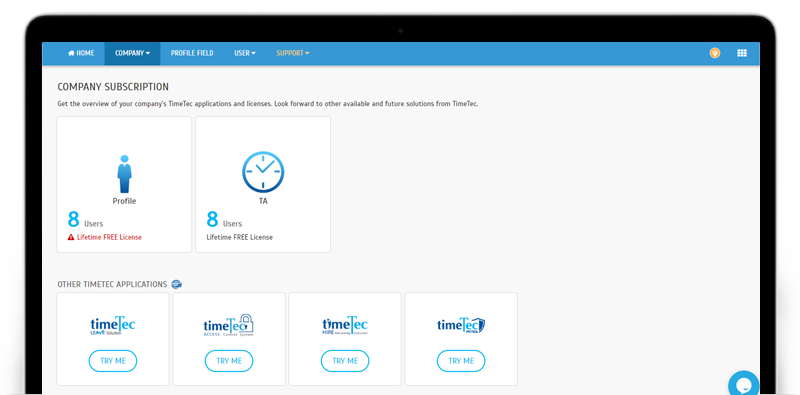
| 2. ‘Company Subscription’ page moved to Company > Company Subscription Due to the introduction of the charts, the former home page section ‘Company Subscription’ has also been moved to a new page under Company > Company Subscription. |
 |
 |
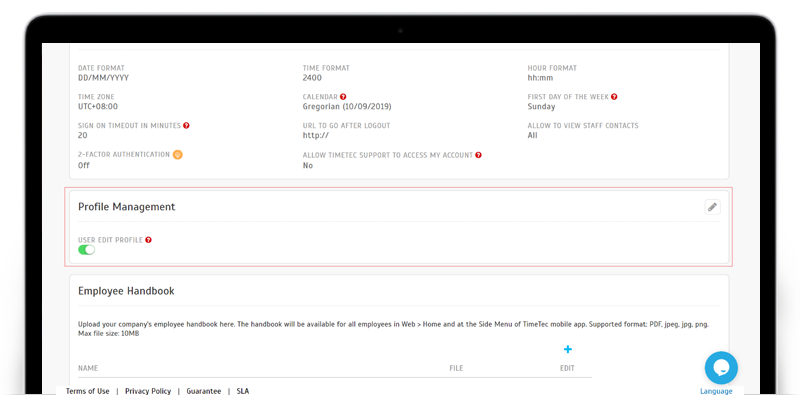
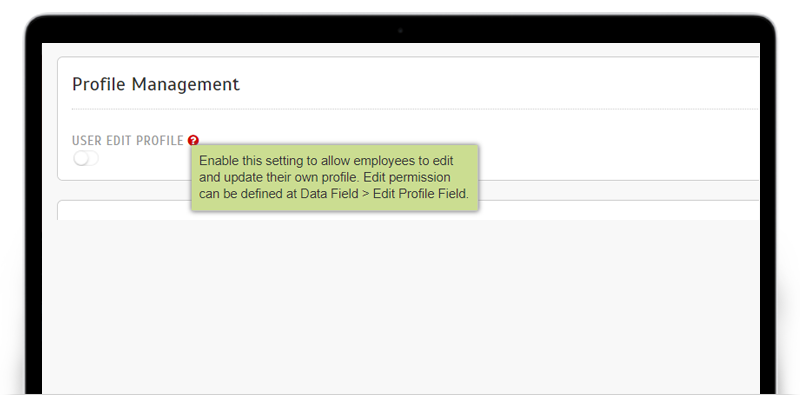
| 3. New System Setting- Allow User to Edit Profile TimeTec Profile is a tool to unify all employee profiles on one platform and besides access for Admins, all TimeTec users are also able to view their own profile, be it from the Mobile App or the Web application. Previously, if a user finds that their personal information requires updating, only Admins had the right to edit the information. However, we’ve just added a new option known as Profile Management, which allows you to define whether users are allowed to edit their own profiles. |
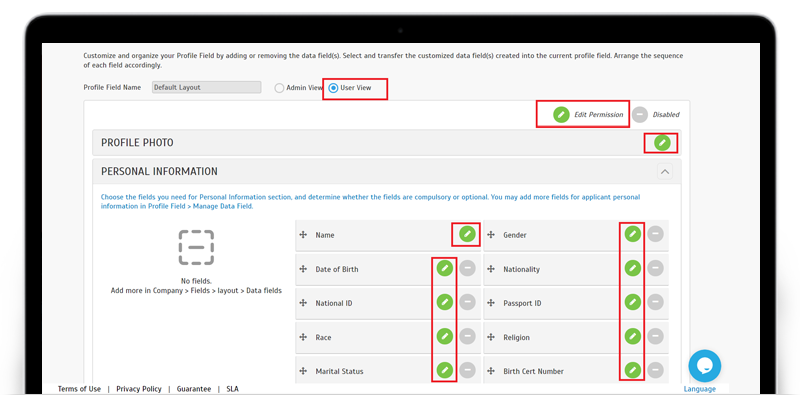
| The details are as follows: i. Admin can go to TimeTec Profile > System Settings > Profile Management. ii. Switch on the toggle button for ‘User Edit Profile’. iii. Go to Profile Field> select User View> Profile Photo/ Personal Information section> select which fields are allowed for user to edit. iv. Note: Users can only be given the right to edit Personal Information and Profile Photo section. |
| Please refer to the sample screenshots below for further details: a. Admin Login > System Settings > Profile Management |
 |
 |
| b. Admin Login > Profile Field > Edit Profile Field > User View Added Edit permission button at Profile Photo & Personal Information sections. |
 |
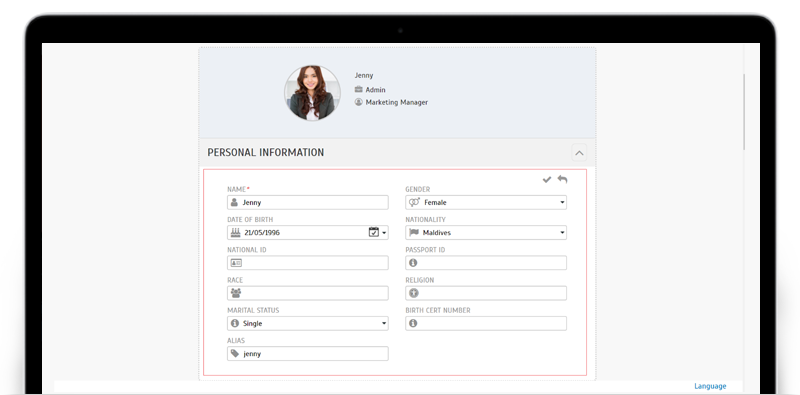
| c. User Login User can edit in Full Profile only (Personal Information). |
 |
| TimeTec TA App Update |
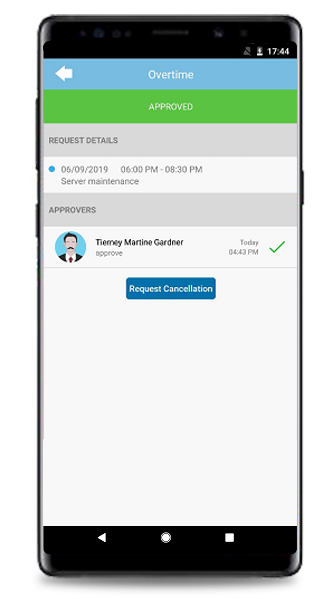
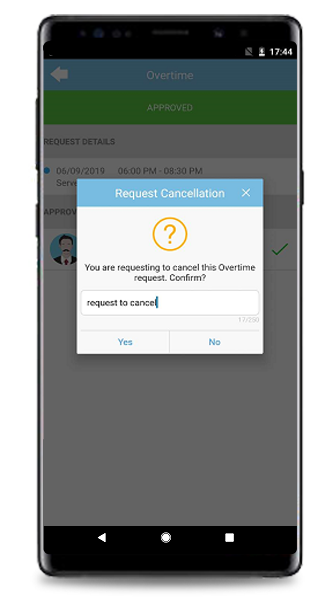
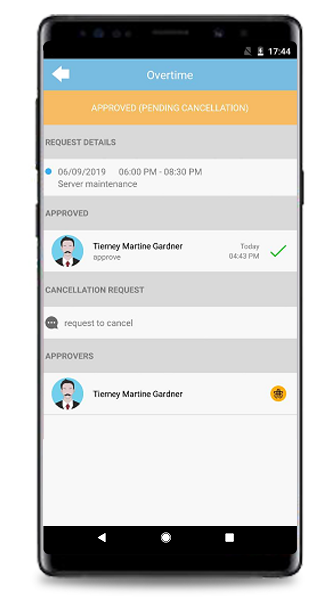
| 1. Approval
Added a Cancel option for approved requests. The cancellation is also subject to approval. User View |
  |
 |
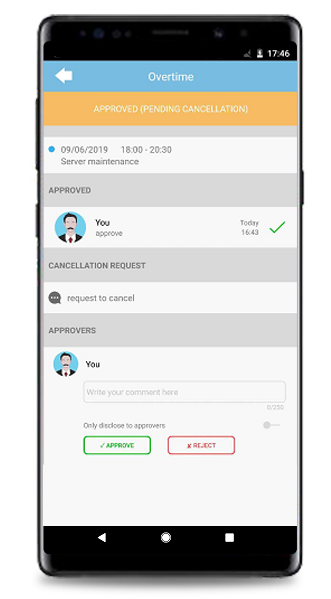
| Approver View |
  |
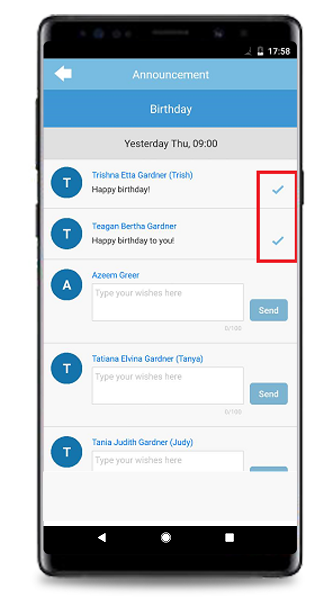
| 2. Notification (Announcement)
Added an indication for sent message. |
 |
| Previous Issue: Aug 2019 • July 2019 • June 2019 |
| Note: If some of the screenshots or steps viewed here are different from the ones in the current system, this is due to our continuous effort to improve our system from time to time. Please notify us at info@timeteccloud.com, we will update it as soon as possible. |
© 2019 Timetec Computing Sdn. Bhd. All rights reserved.