 |
|
|
|
|
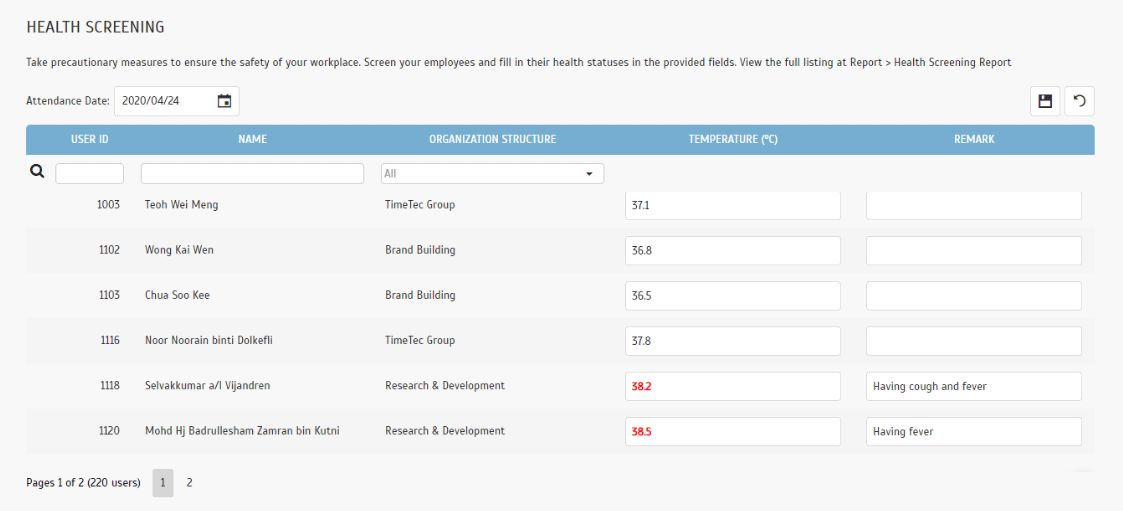
Is your company currently or having plans to implement regular body temperature checks as one of the preventive safety measures? Check out TimeTec's recently released feature - Health Screening feature. This functionality enables you to keep records and monitor staff daily temperature readings. If any employee encounters an unusual temperature or other symptoms of illness, this feature will allow you to take immediate action to lower the risk of spreading the infectious disease.
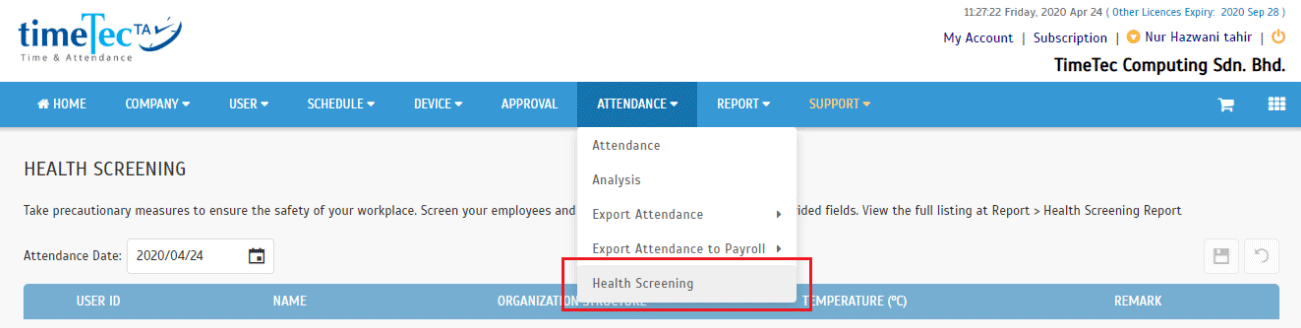
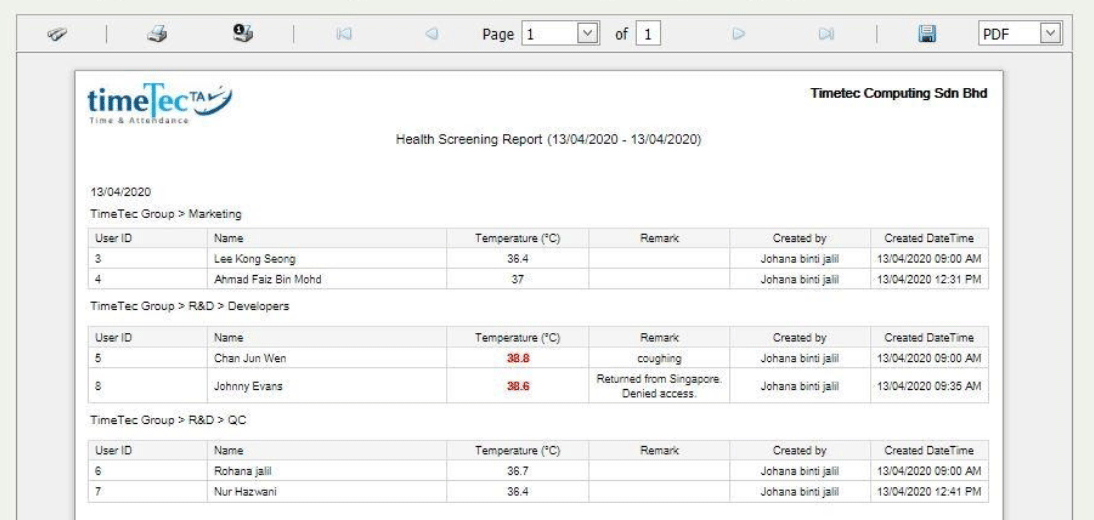
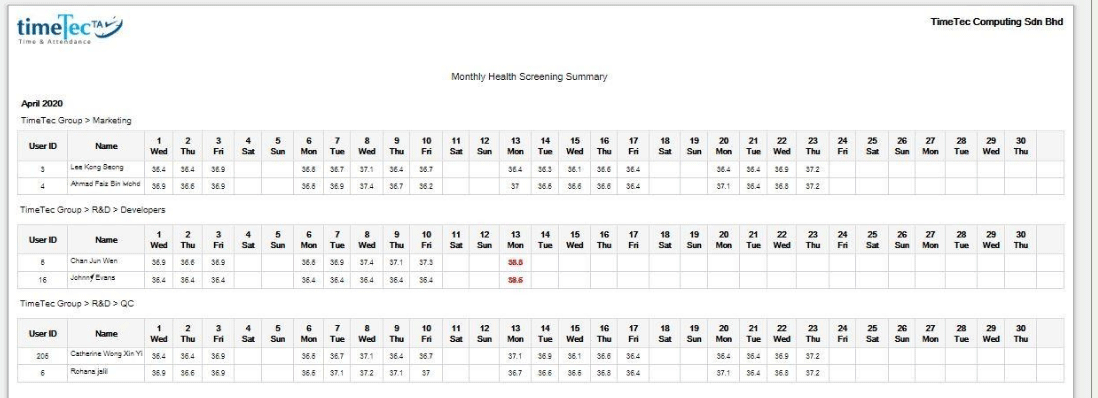
To enable this, go to Menu > Attendance > Health Screening. Fill in the health statuses in the provided fields. Subsequently, you can review the full records at Report > Health Screening. 2 new reports have been added, namely ‘Health Screening Report' and 'Monthly Health Screening Summary'. |
| a. Added 'Health Screening' under the Attendance Menu |
 |
| b. Record Employees' Temperature and Remark |
 |
| c. Added 'Health Screening Report' & ‘Monthly Health Screening Summary' |
 |
| d. Health Screening Report |
 |
| e. Monthly Health Screening Summary Report |
 |
|
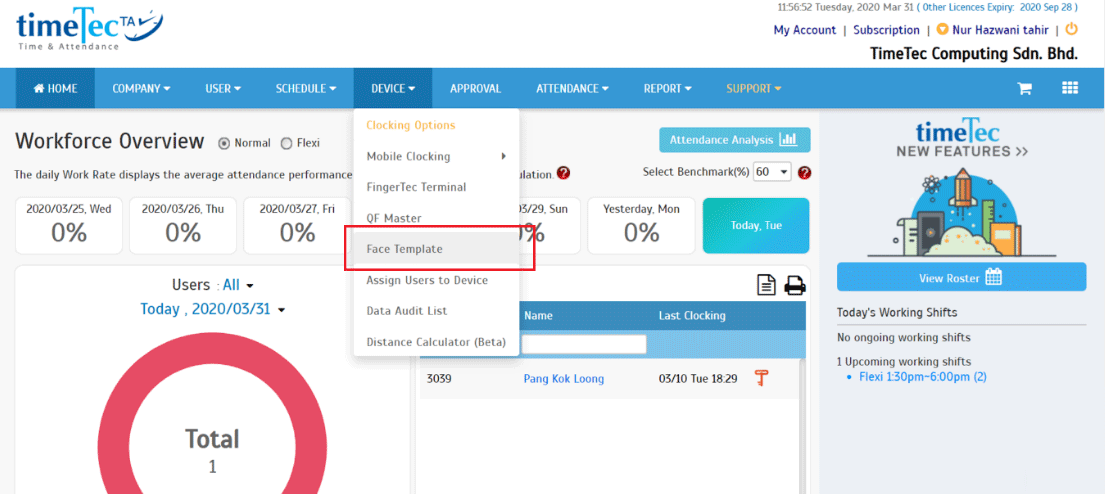
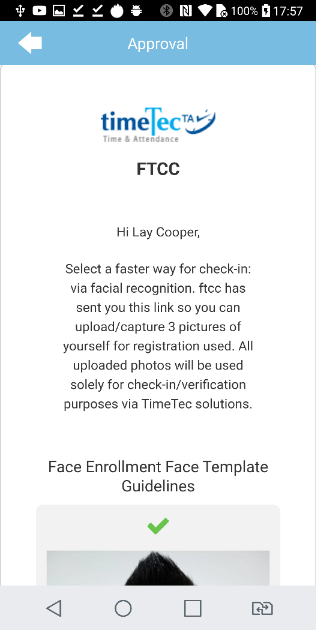
The next update is for companies which deploy the QF Master devices. QF Master is an Android-based app that provides face recognition and also QR Code identification. QF Master can be used jointly with TimeTec TA for attendance clocking and also along with other TimeTec solutions such as TimeTec Access, TimeTec VMS and i-Neighbour for door access purposes. Refer to this link for more information on adding the QF Master into the TimeTec TA. In April, a new function was added that allows Admins to manage employees’ face templates for authentication in the QF Master devices. More details are as follows:
Please refer to the sample screenshots below for further details: |
|
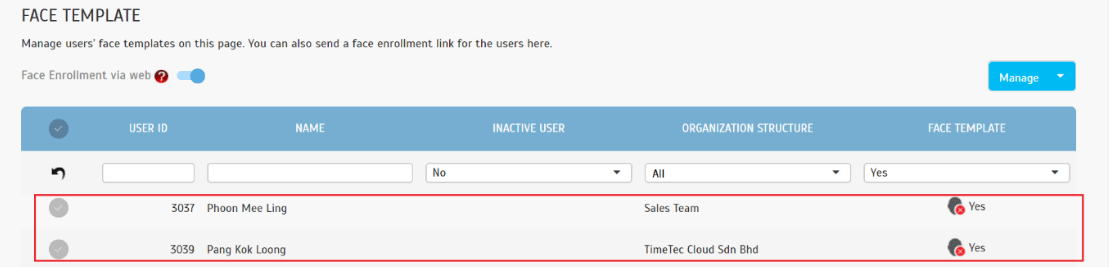
| a. Added new page: Device > Face Template | |
 |
|
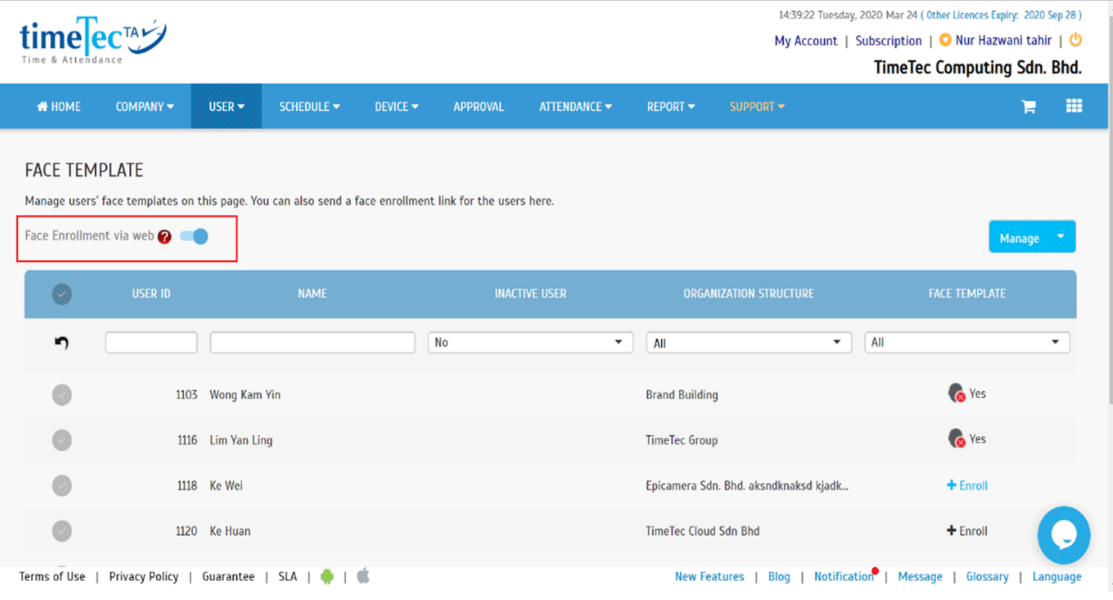
| b. Face Enrollment via Web i. Enable Face Enrollment via Web |
|
 |
|
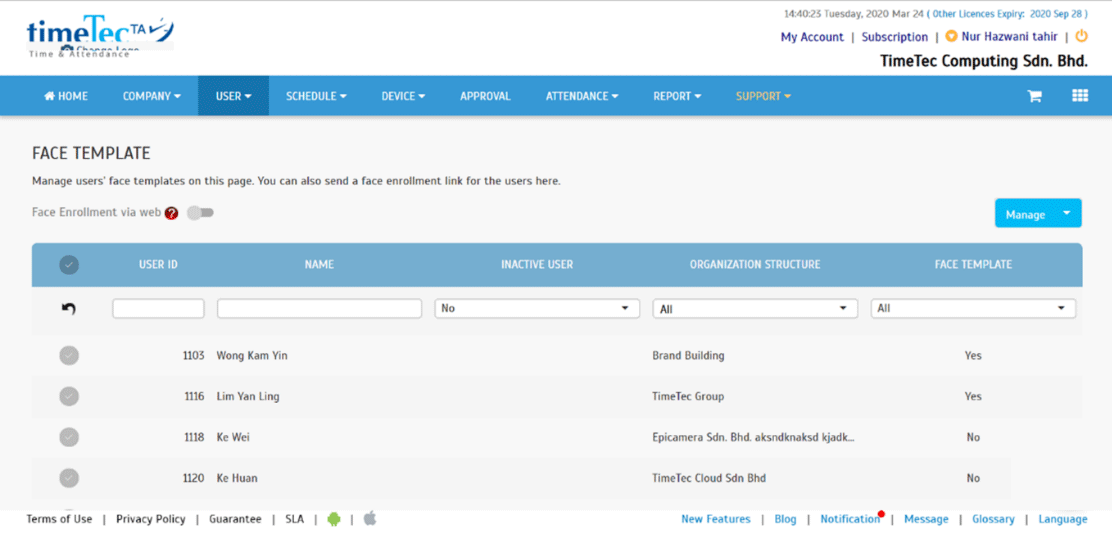
| ii. Disable Face Enrollment via Web | |
 |
|
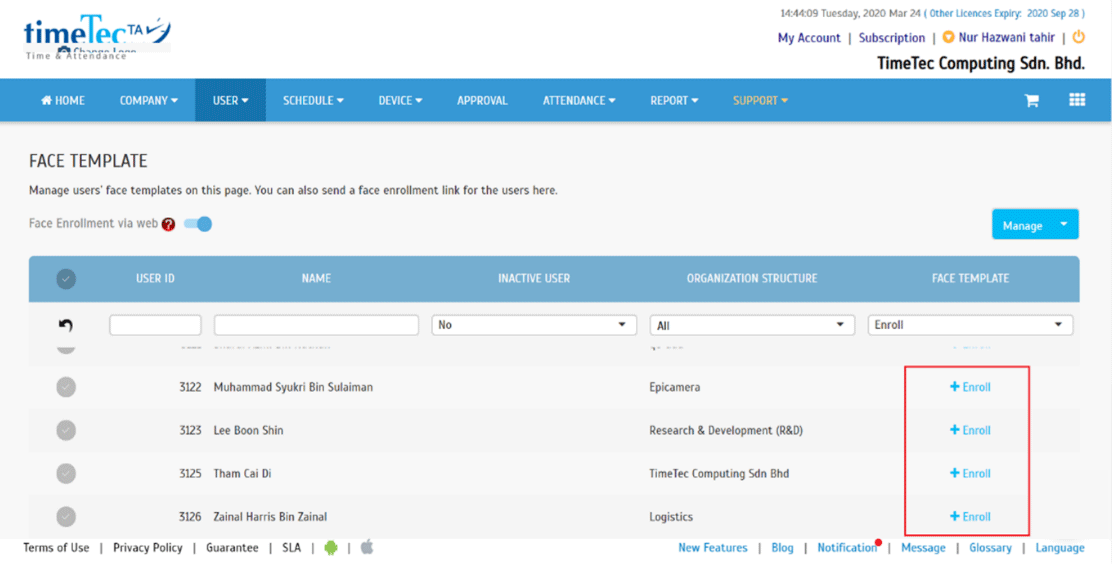
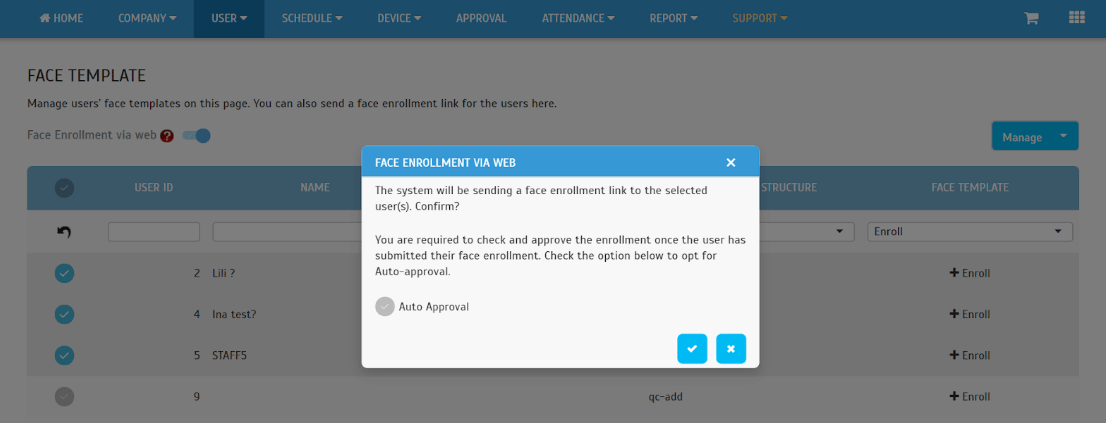
| c. Enroll Face Template Click on the button to enroll face template for the users. |
|
 |
|
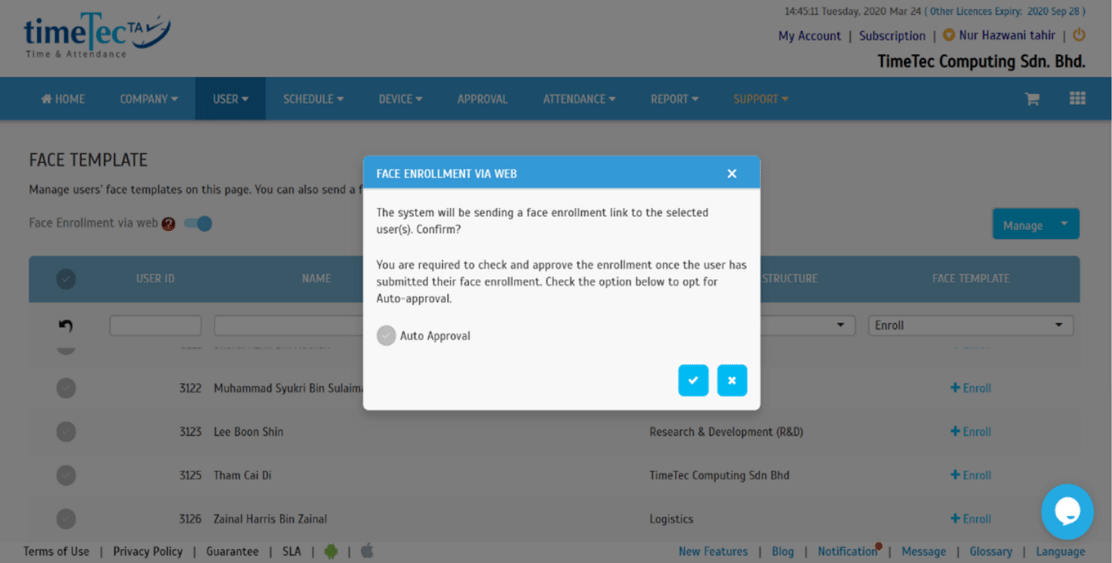
| d. Confirmation Message Admin can choose to approve manually or to check the Auto Approval checkbox. |
|
 |
|
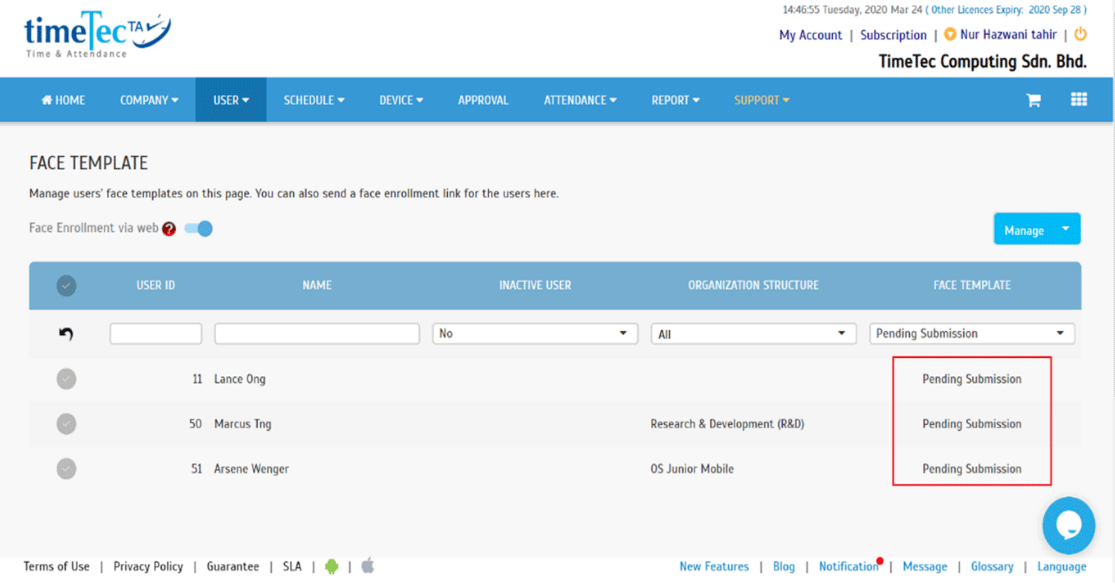
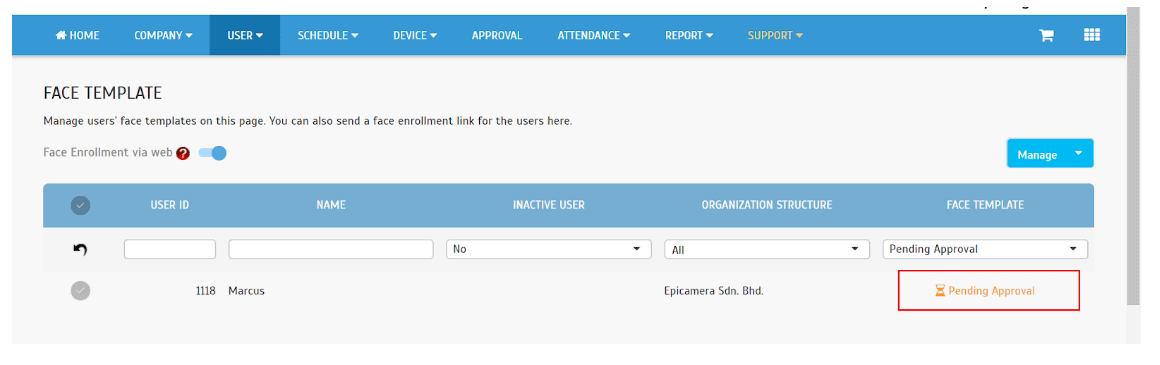
| e. Admin View Pending Submission Status | |
 |
|
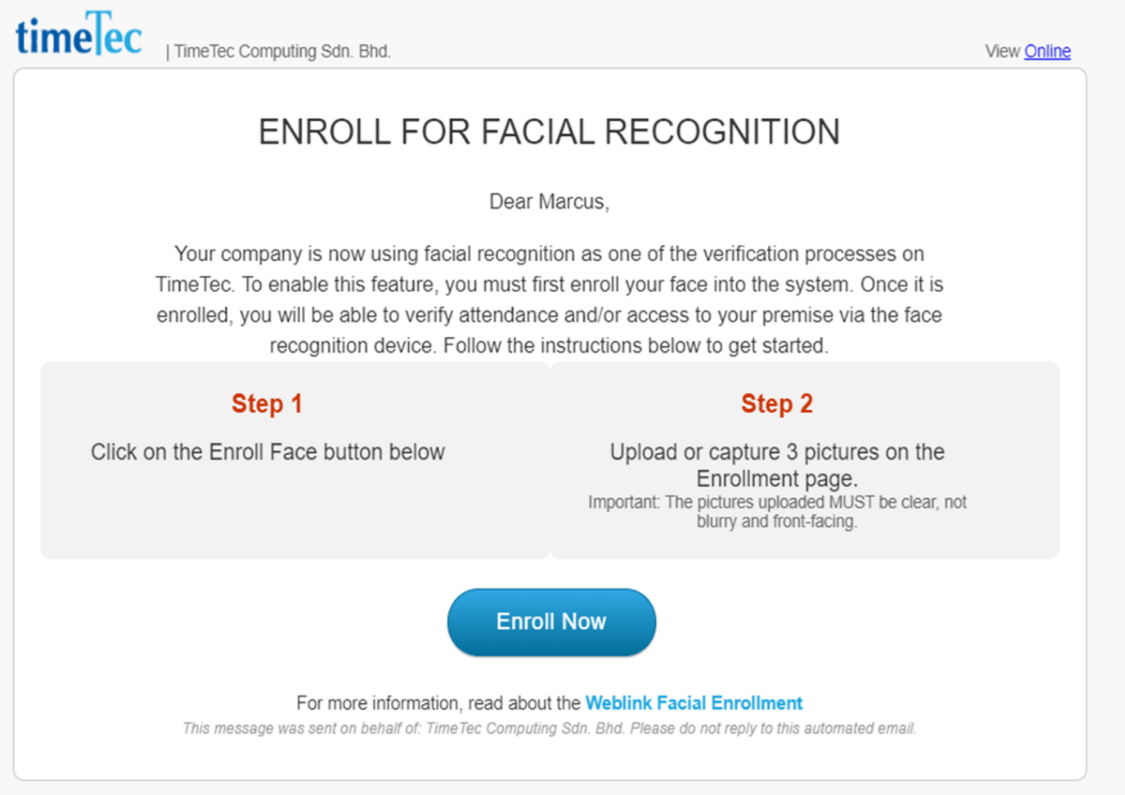
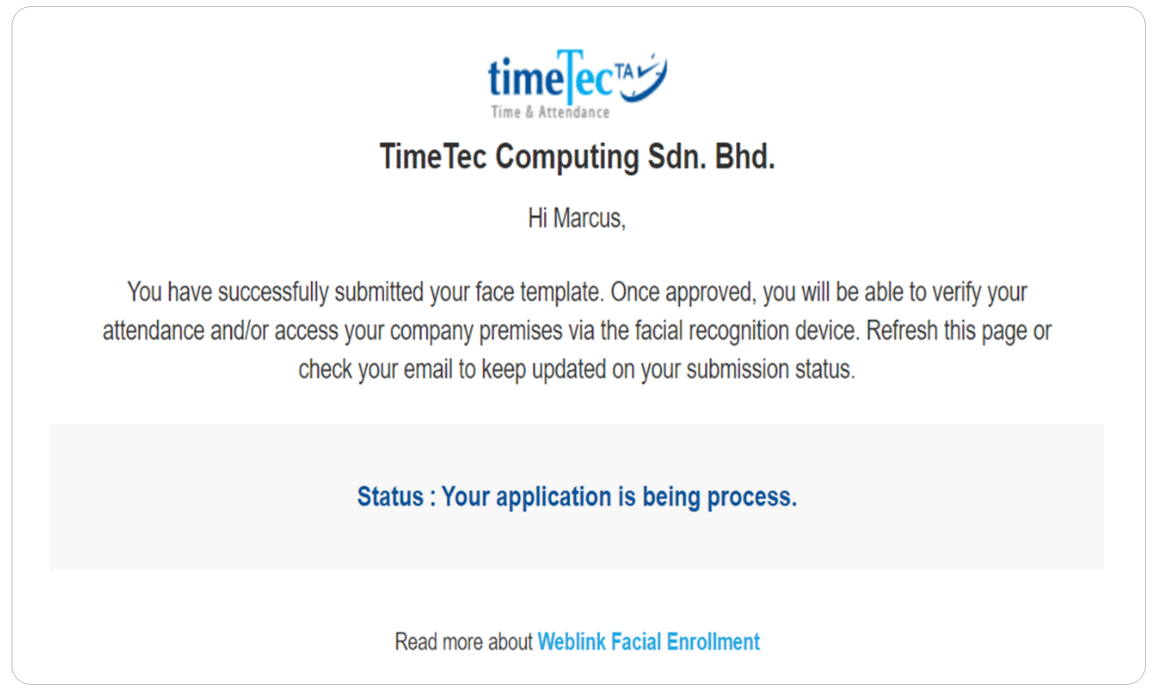
| f. Email Received by the User | |
 |
|
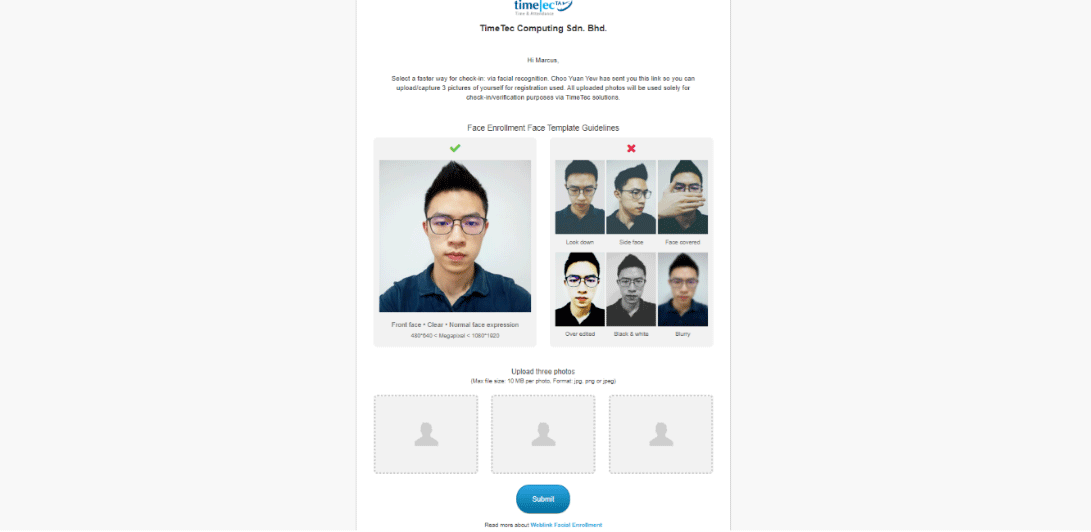
| g. Enrollment Page Users will be navigated to the enrollment web link page after they have clicked on the 'Enroll Now' button. |
|
 |
|
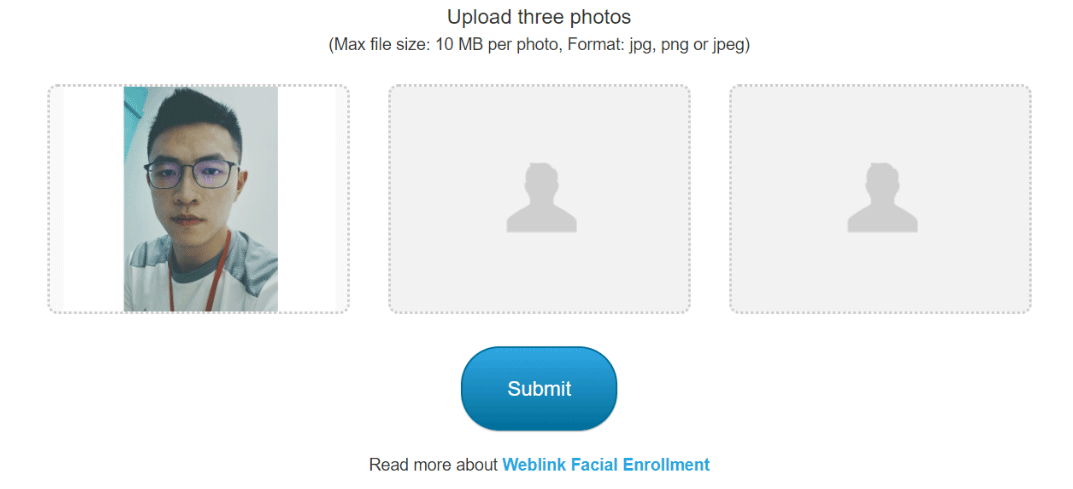
| h. Upload Photo | |
 |
|
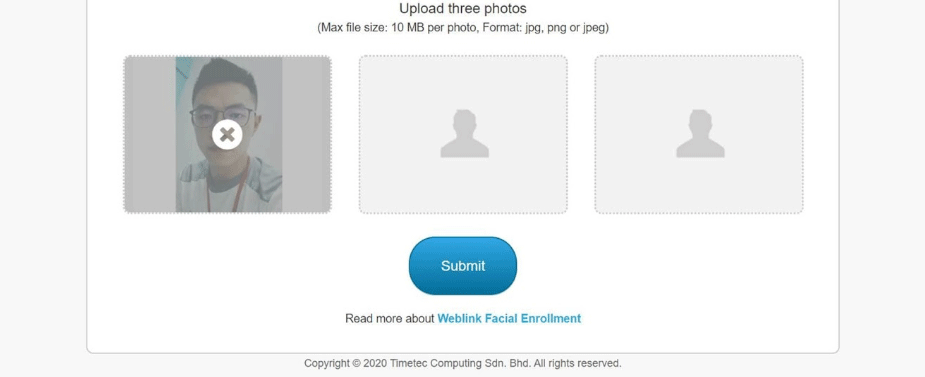
| i. Click the Cancel Button to Remove Uploaded Photo | |
 |
|
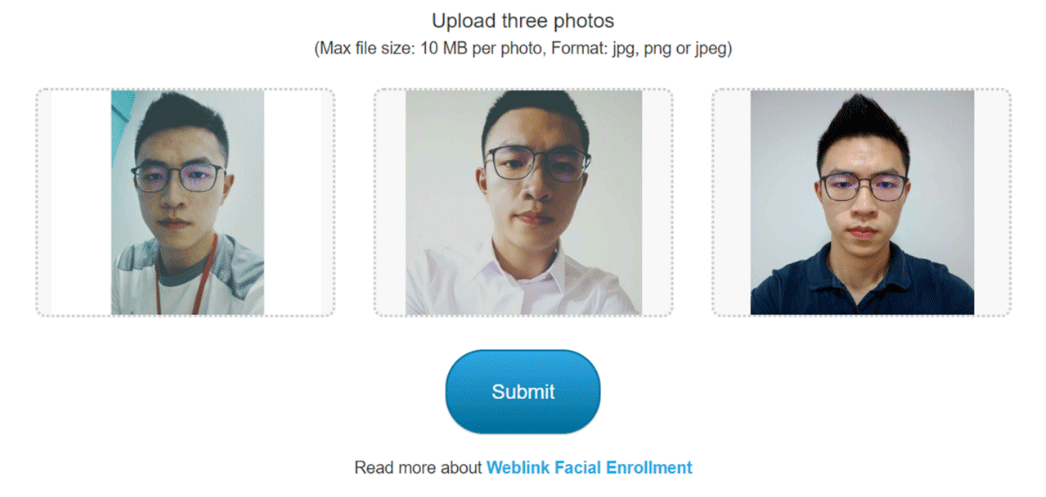
| j. The Submit Button will be enabled after the user has uploaded 3 different photos. | |
 |
|
| k. Status Pages | |
 |
|
 |
|
 |
|
| l. Admin View for Processing Status | |
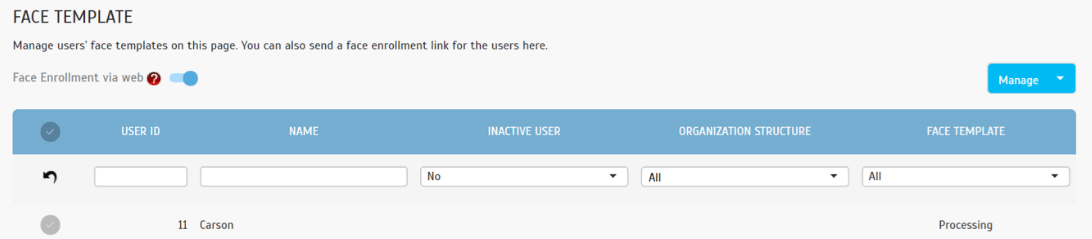 |
|
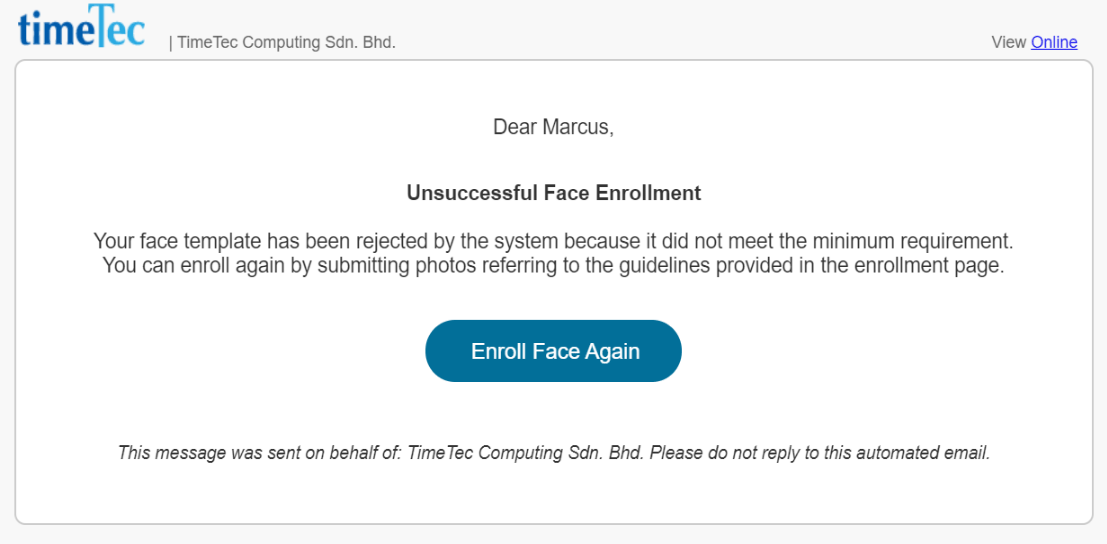
| m. Email for Unsuccessful Face Enrollment Email will be sent out if the users failed to meet the images’ requirements. The users will be given a maximum of 3 chances to re-enroll. |
|
 |
|
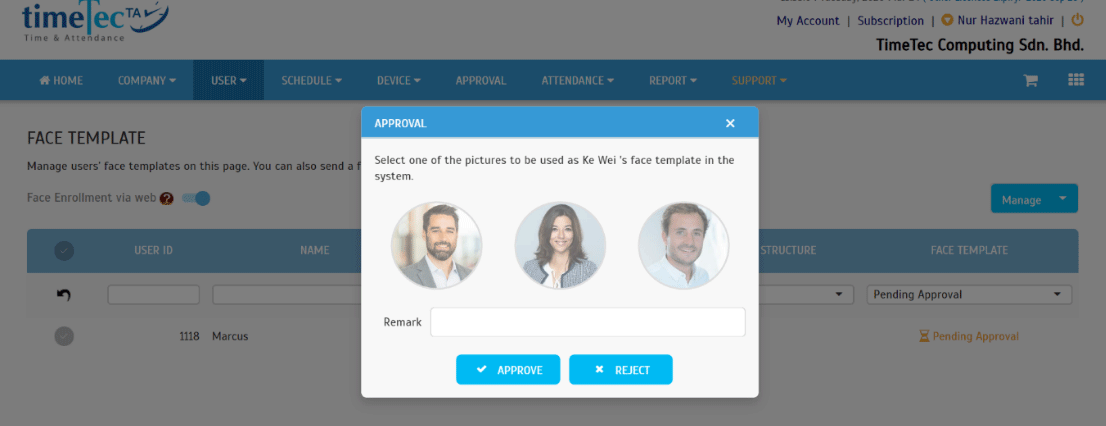
| n. Admin Approve/ Reject the Face Template | |
 |
|
 |
|
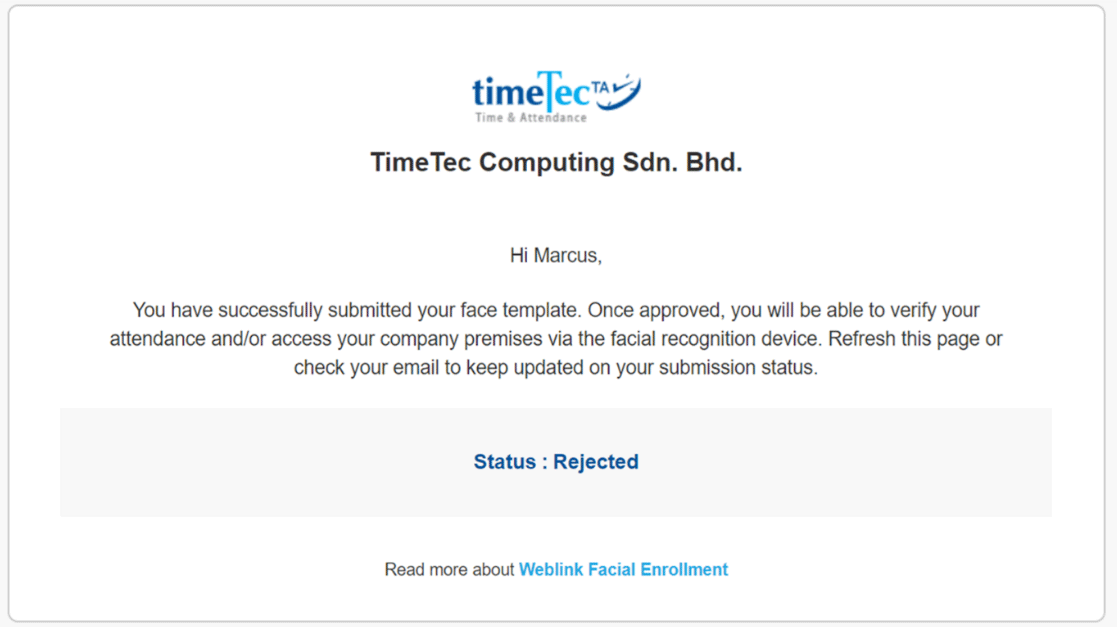
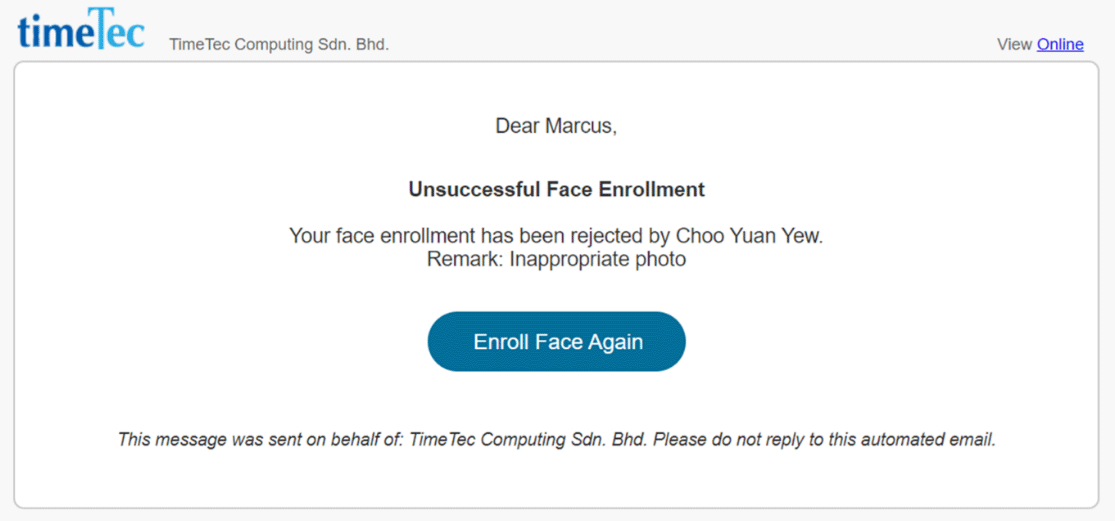
| o. Email for Rejected Face Enrollment | |
 |
|
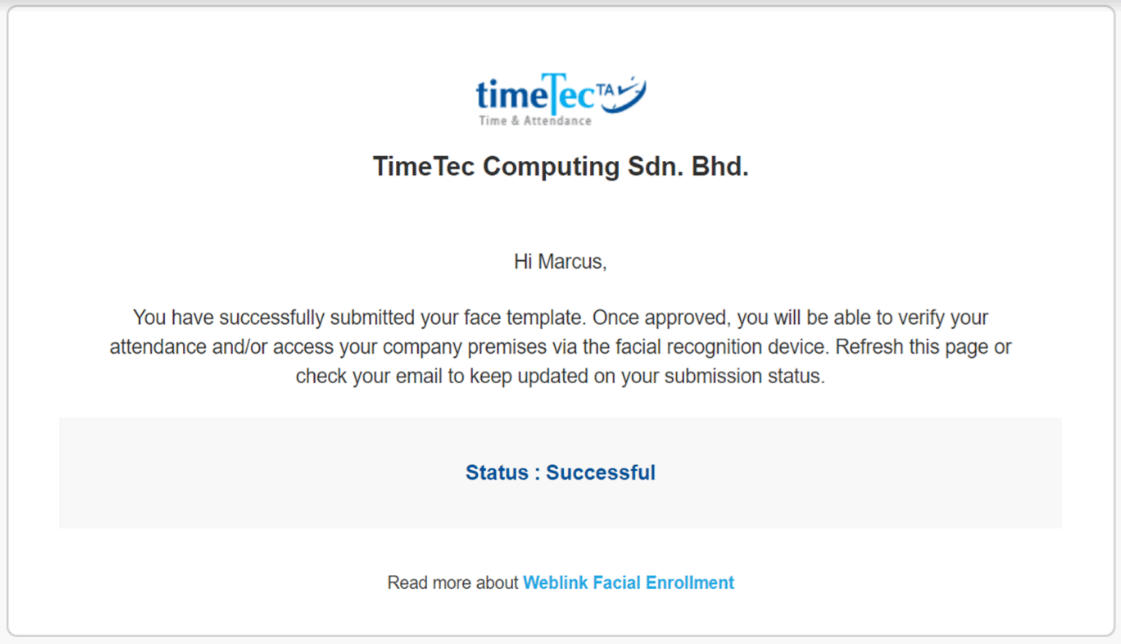
| p. Successful Face Enrollment Email | |
 |
|
| q. Admin View for Successful Enrollment | |
 |
|
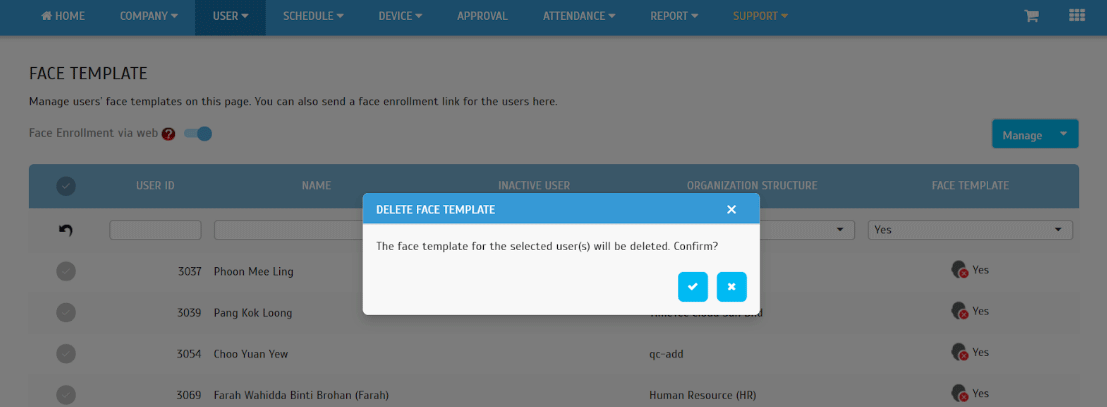
| r. Delete Face Template i. Click to Remove User’s Face Template |
|
|
|
| ii. Confirmation Message to Delete | |
 |
|
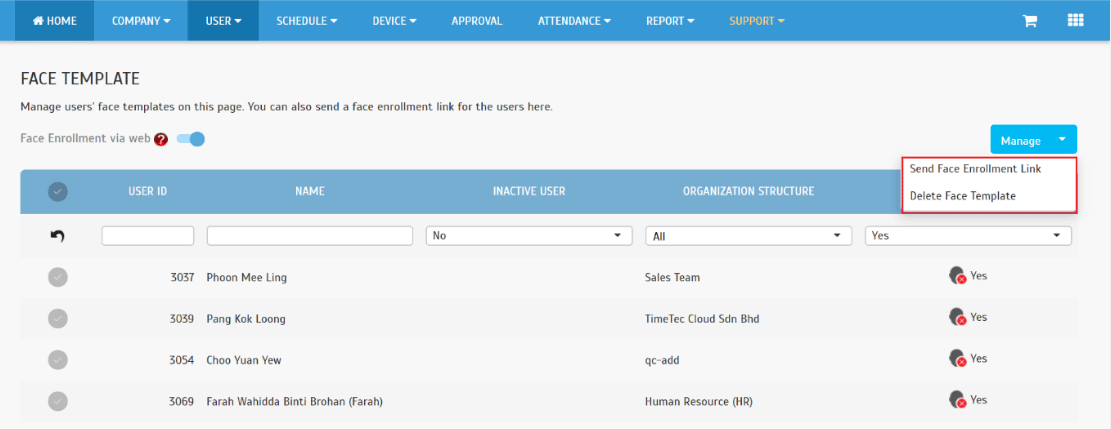
| s. Batch update User | |
 |
|
 |
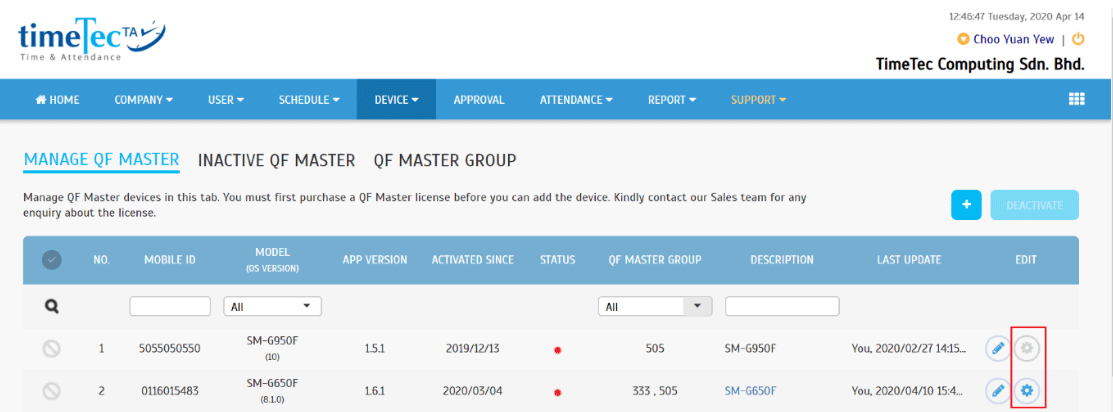
| On the Manage QF Master page, we have also added the QF Master Configuration in the Edit column. This configuration only supports QF Master Version 1.6.0 and above. |
| a. Device > QF Master > Manage QF Master |
 |
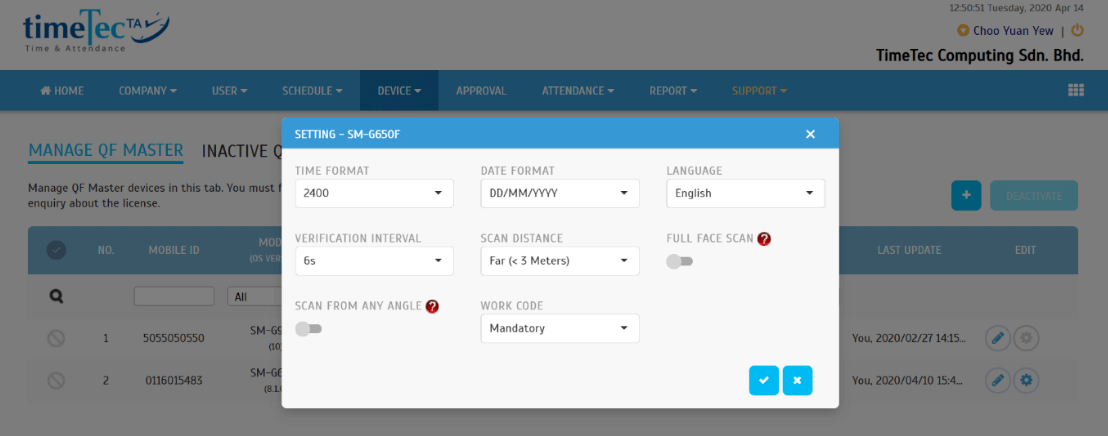
| b. QF Master Configuration Configure the setting and click Save. The configuration will be synced to QF Master. |
 |
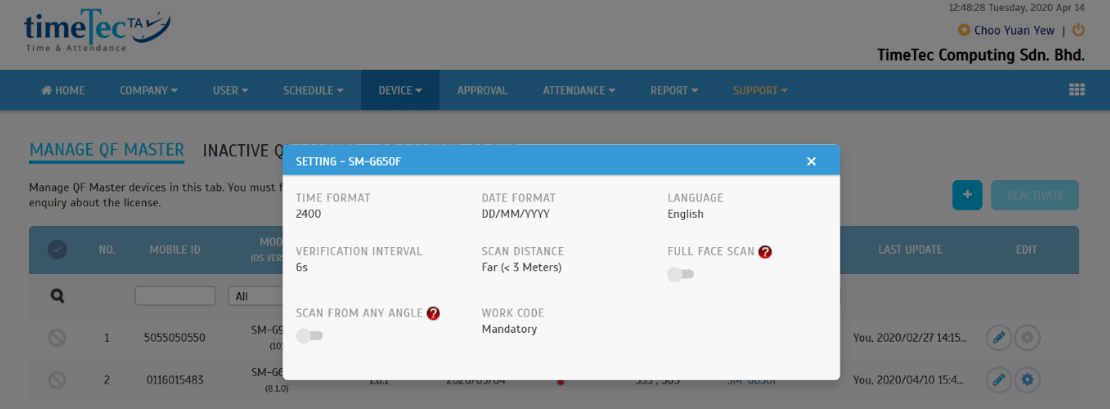
| c. Display QF Master Description |
 |
|
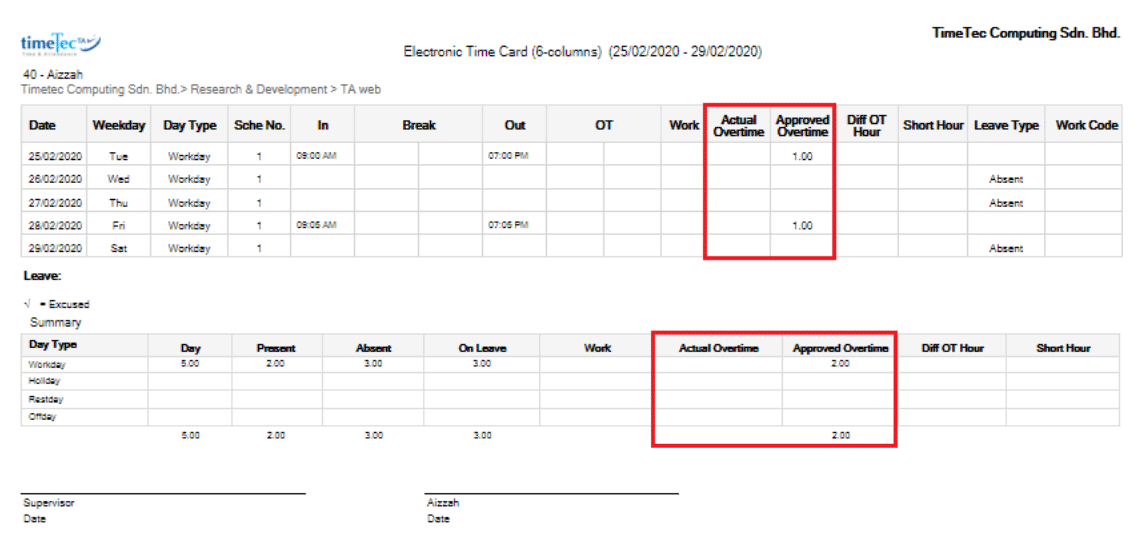
For this report, we have recently: i. Added one more column for 'Approved Overtime' ii. Changed 'OT Hour' To 'Actual Overtime' |
 |
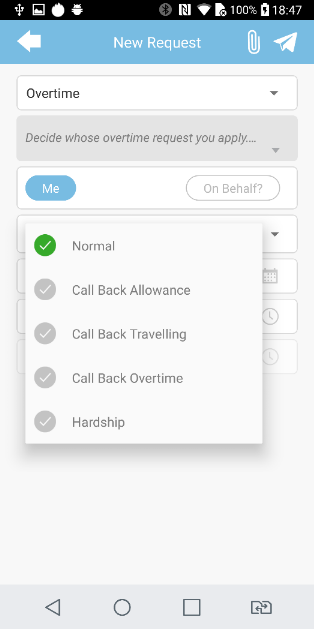
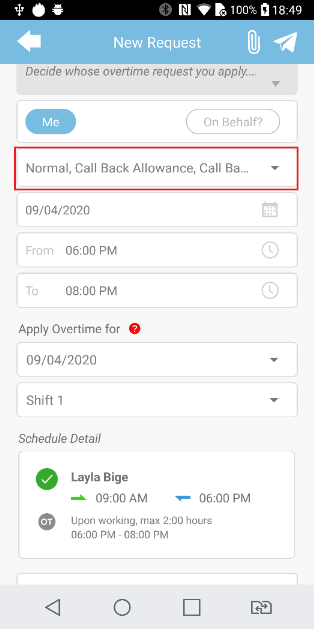
| In February, we have enhanced the Overtime Approval process by adding an option to select the Overtime Type (e.g. Public Holiday, Special Overtime, Company Events etc.) in users’ applications. Further to that, in April, we have also made the changes stated below: |
| a. Allow Multiple Selection of Overtime Type |
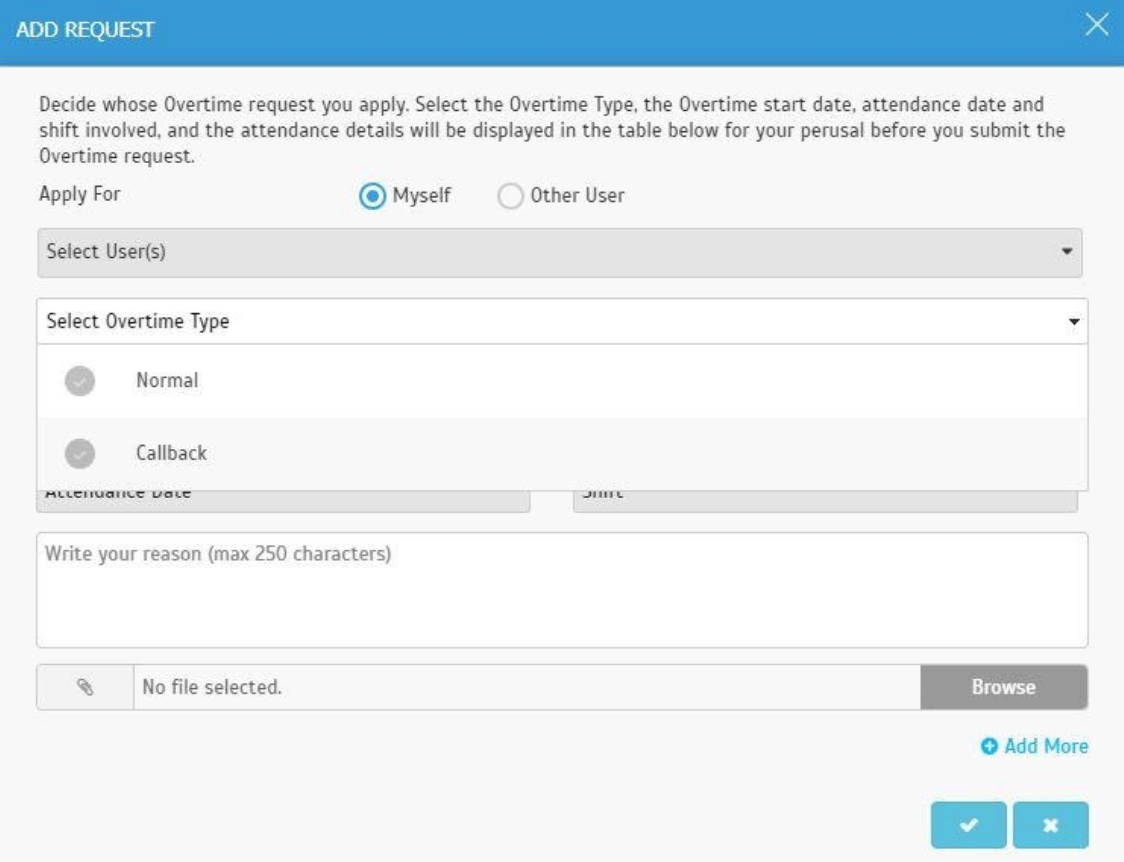 |
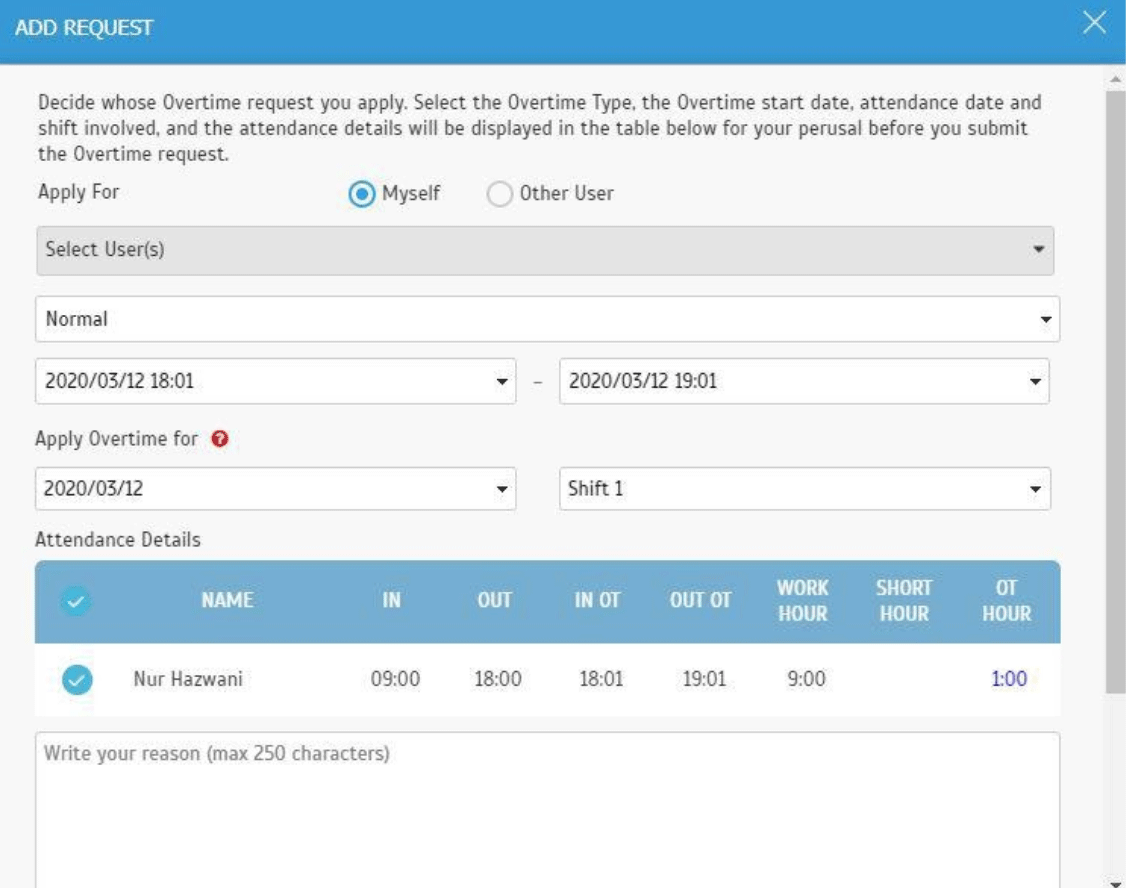
| b. Attendance Details Table – Added 'In OT', 'Out OT', 'Work Hour', 'Short Hour' & 'OT Hour' |
 |
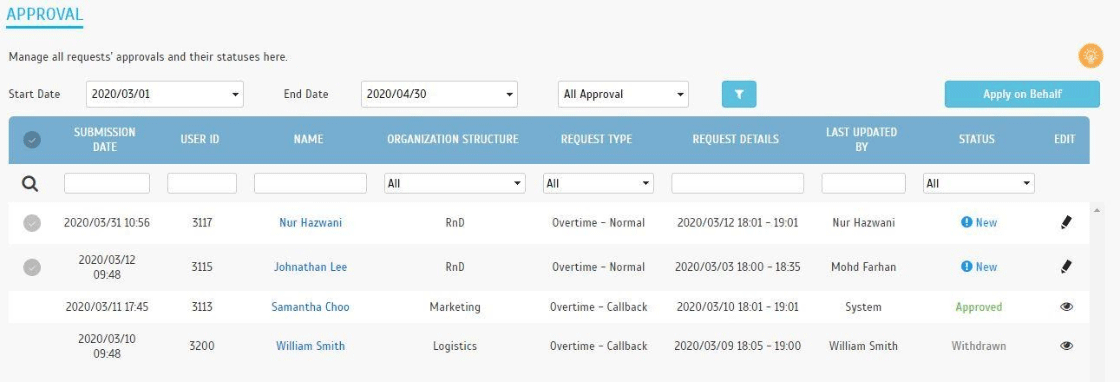
| c. Approval Request - Display ‘Overtime Type’ under ‘Request Type’ Column |
 |
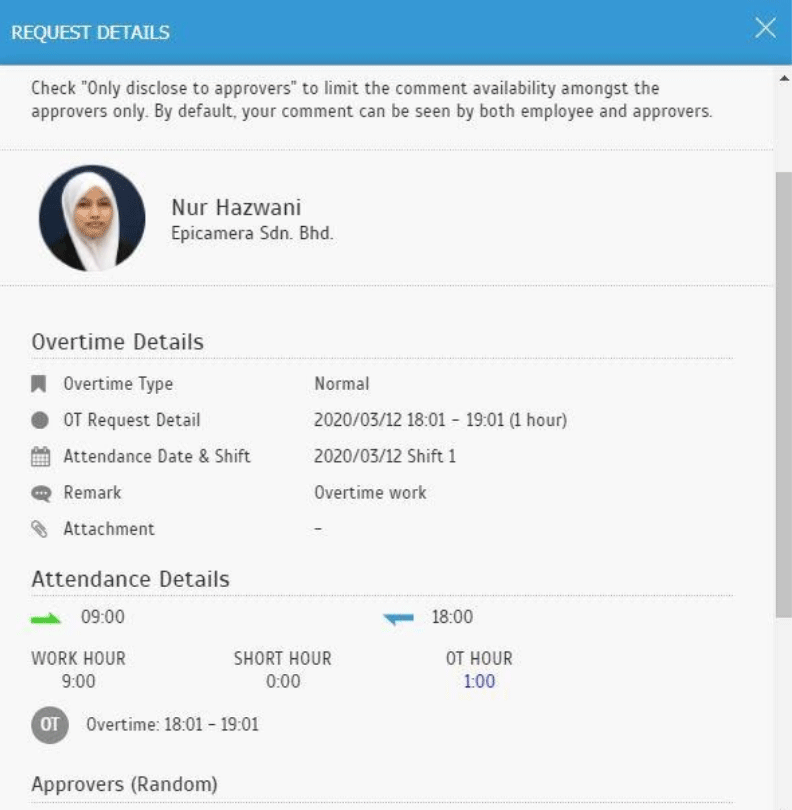
| d. Approval Request Details – Updated 'Overtime Details' & 'Attendance Details' |
 |
| This is another enhancement for Overtime management but this is only applicable to the Admin. As an Admin, you can now import details of all Overtime requests into the system with an Excel file and also to apply these Overtime requests on behalf of relevant employees. Refer to the details below: |
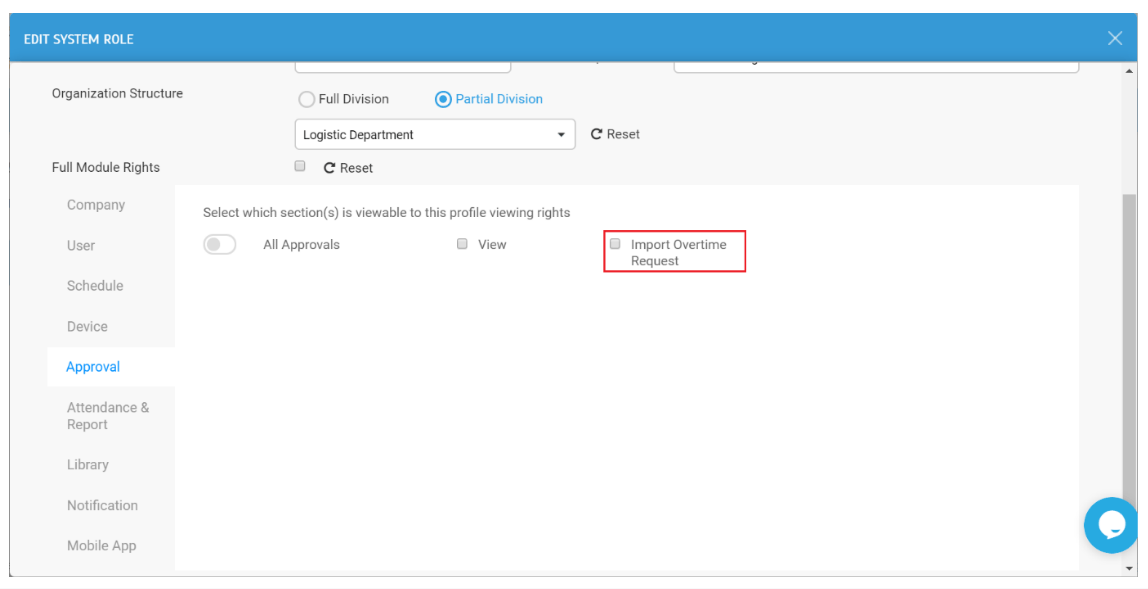
| a. Added 'Import Overtime Request' in the System Role |
 |
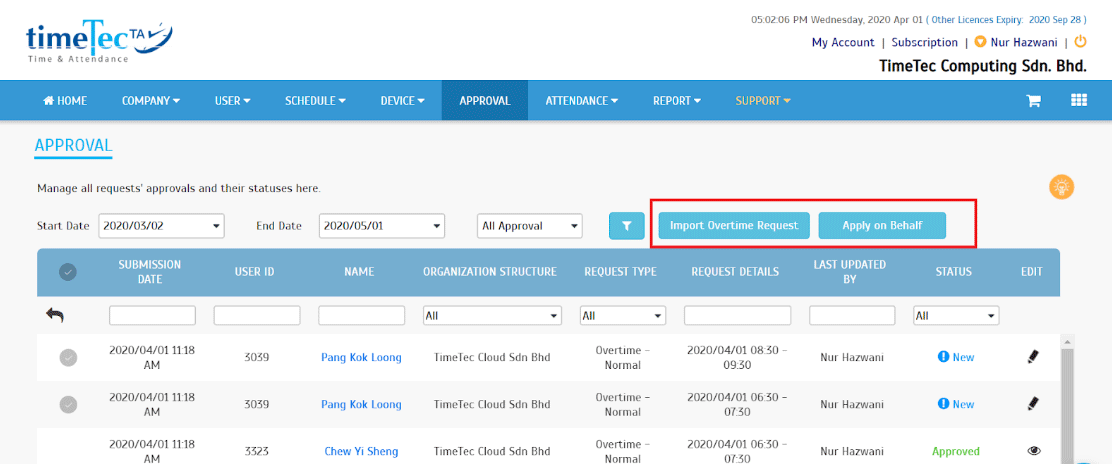
| b. Approval Request List - Added buttons for 'Import Overtime Request' & 'Apply on Behalf' |
 |
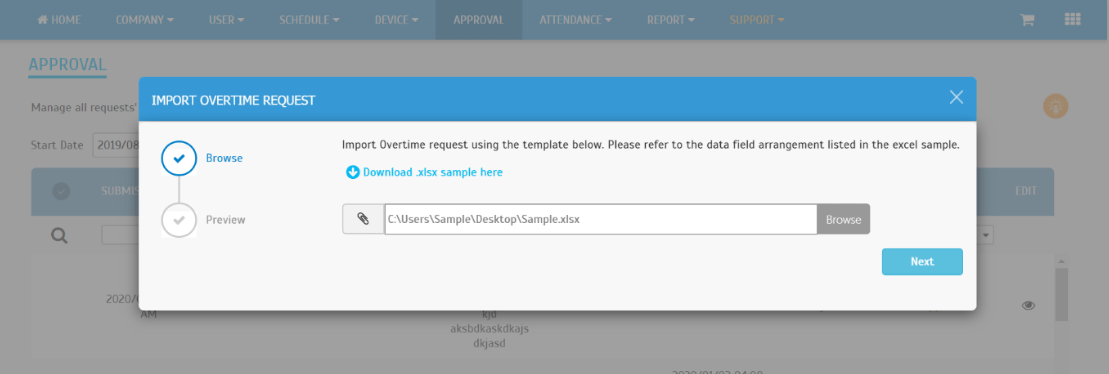
| c. Import Overtime Request |
 |
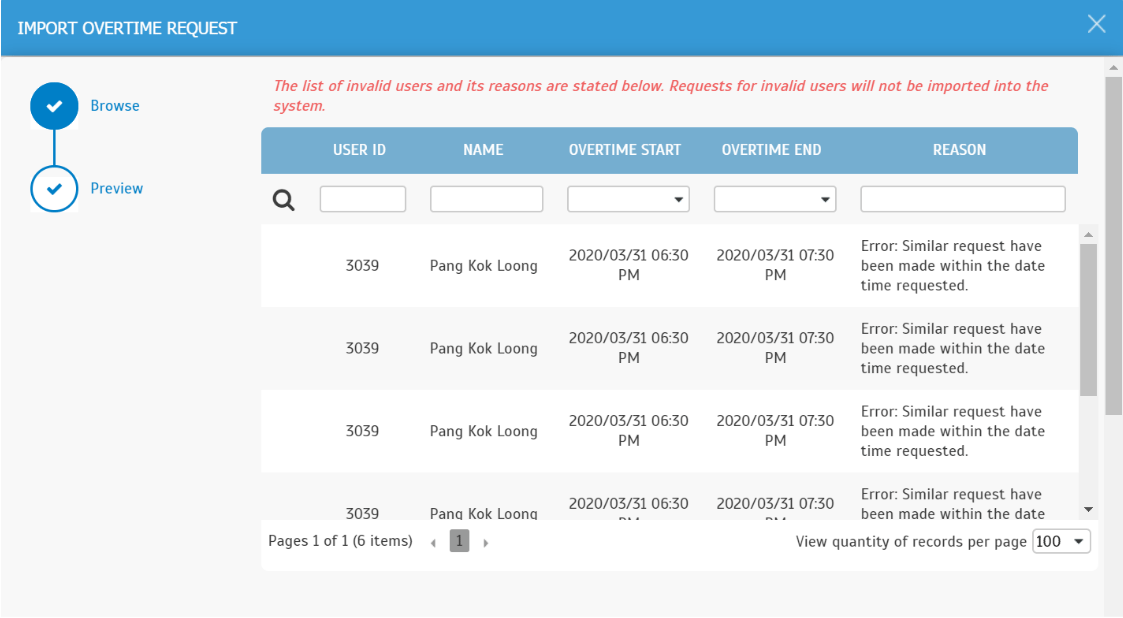
| d. Preview for Admin Before Importing Overtime i. Invalid Request |
 |
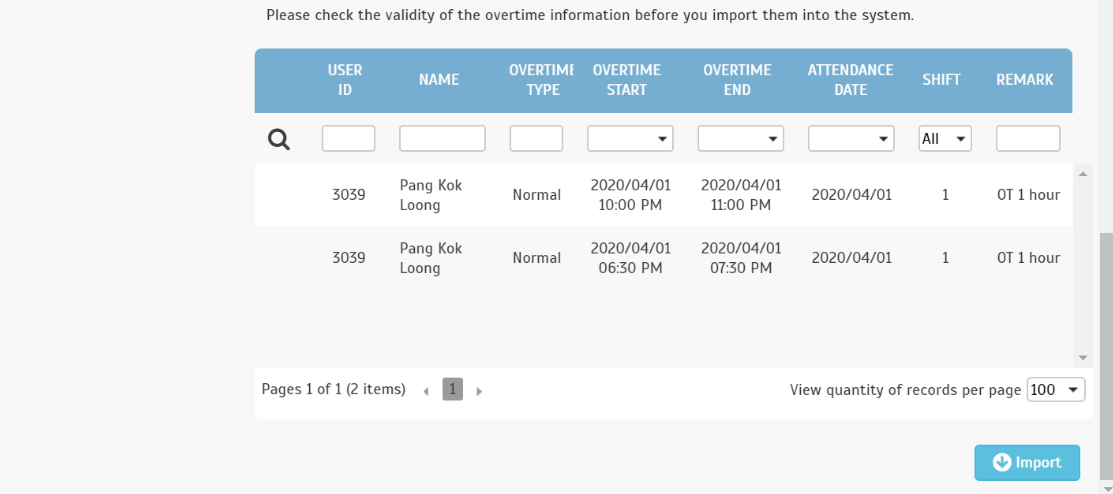
| ii. Valid Request |
 |
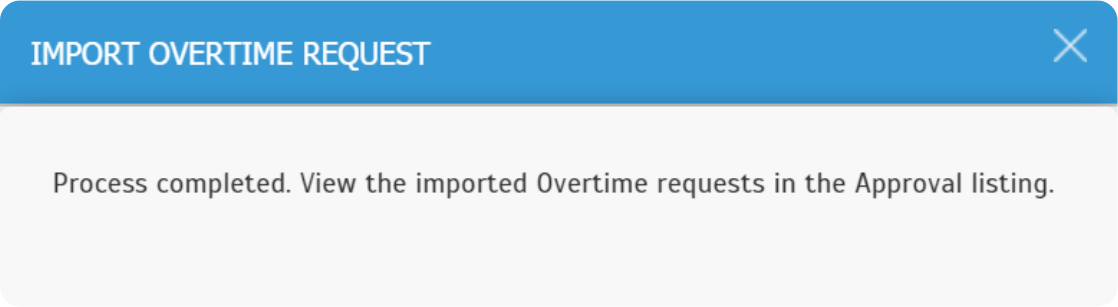
| e. Import Success Message |
 |
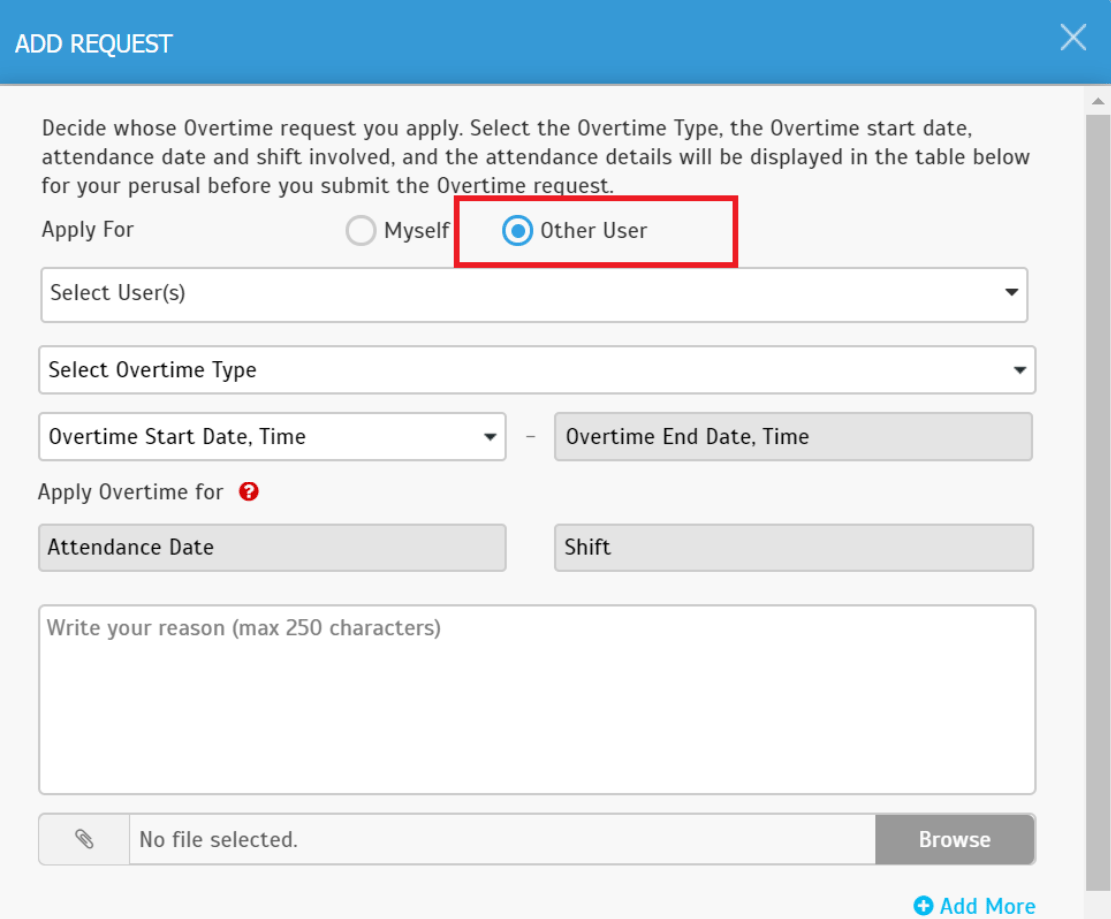
| f. Apply on Behalf |
 |
|
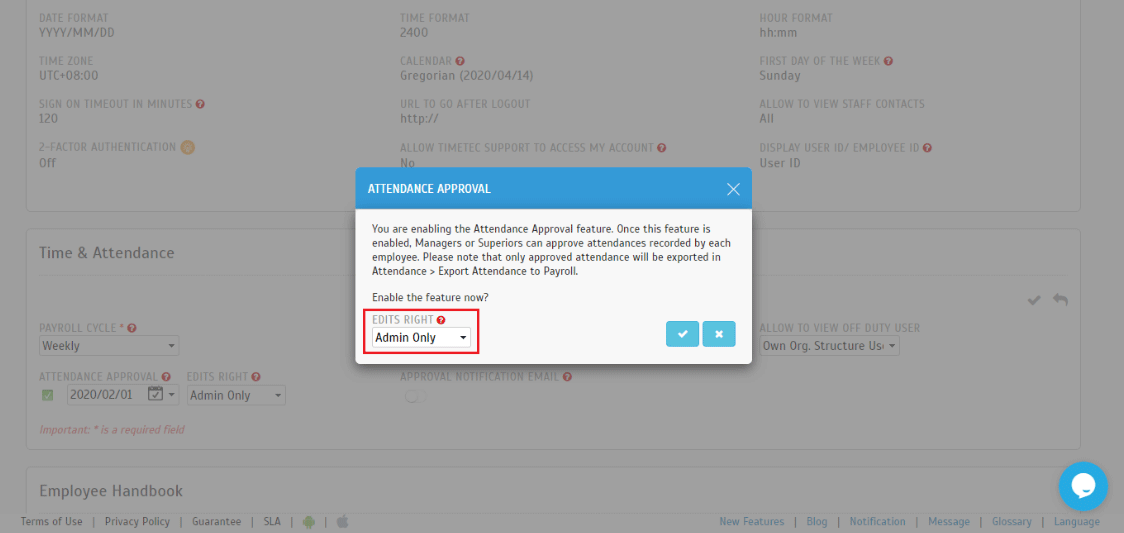
In TimeTec TA, there is an Attendance Approval feature (at System Settings) that can be used to automate attendance approval. When this option is enabled, Admins are required to check and approve all staff attendance. Only approved attendance data can be exported from the system for payroll processing and it will not be updated easily unless the Admin reverses the approval. However, users can still submit requests to edit their own attendance.
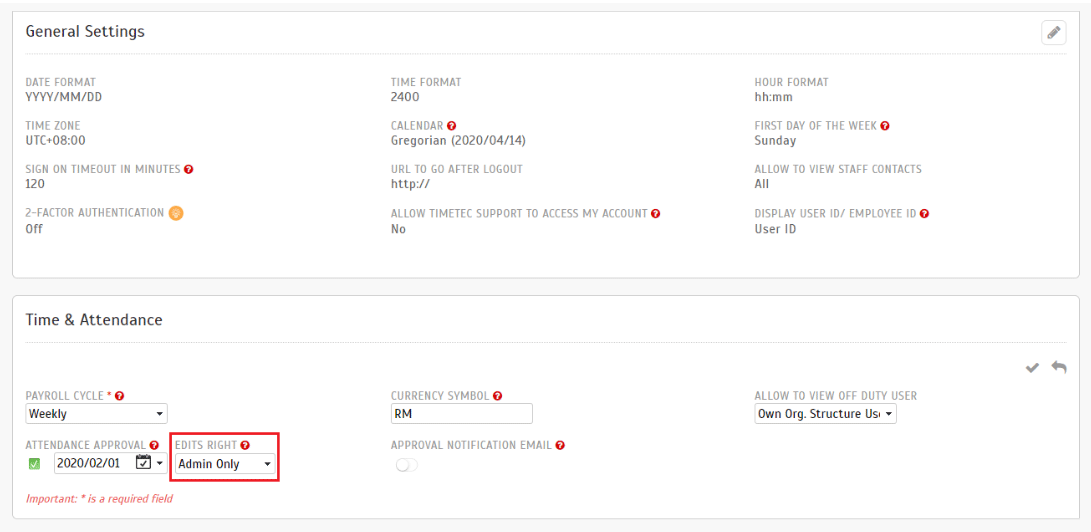
This month, we have enhanced the options available for Attendance Approval. If you do not want to allow users to edit their attendance, you can amend the Edit rights to 'Admin Only'. |
|
 |
 |
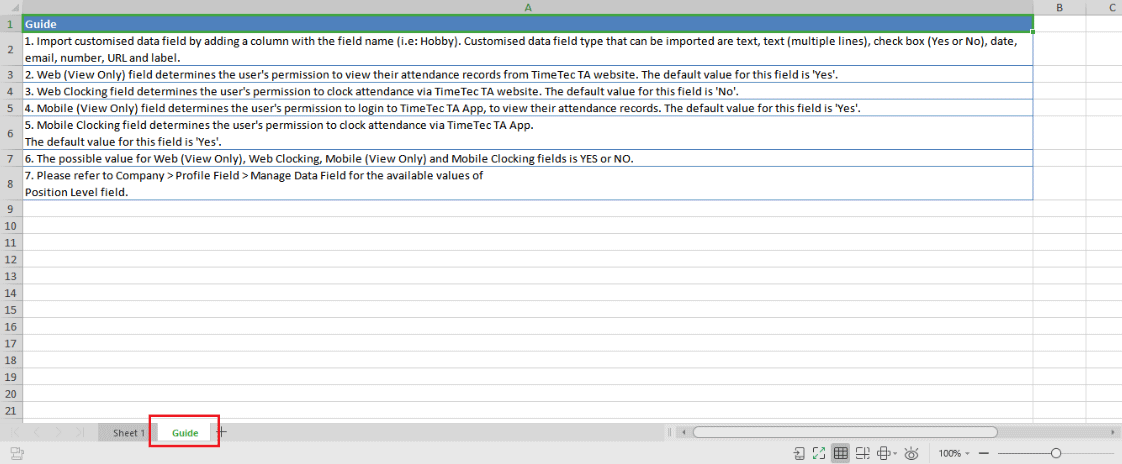
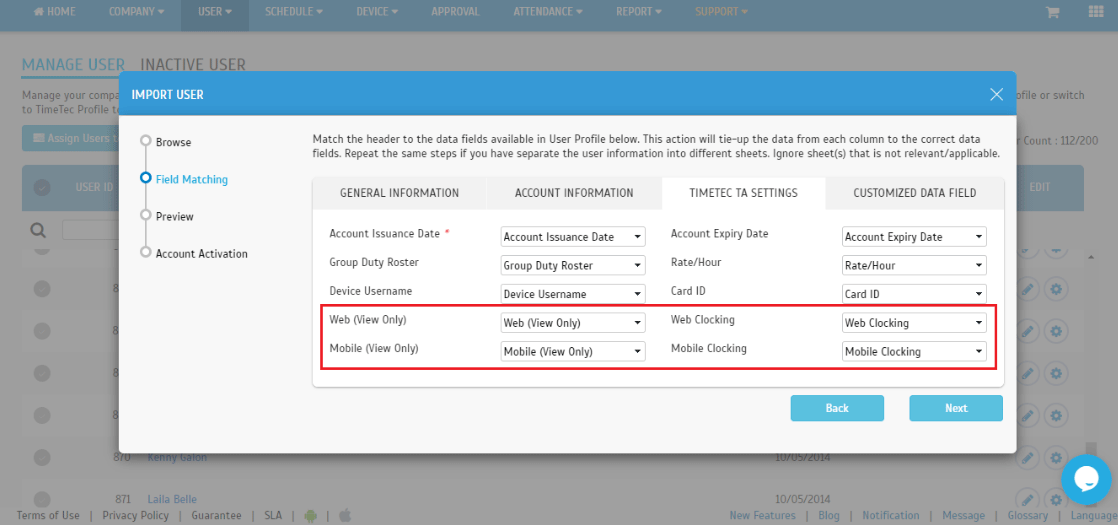
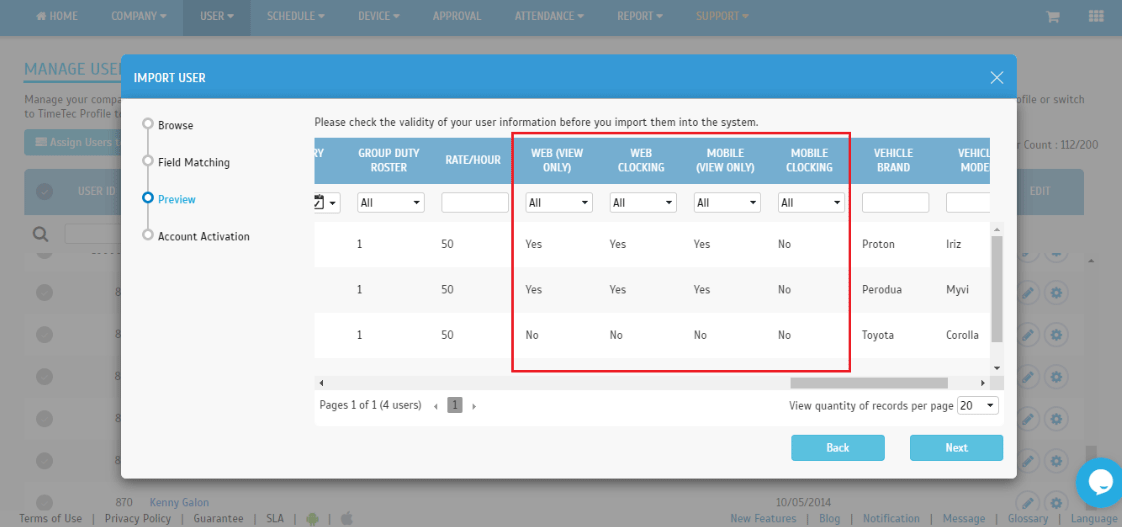
| To facilitate a quick setup and import of users, we have updated the import user function (User > (Manage User > Manage > Import User) as follows: |
|
 |
| iii. A new sheet "Guide" is added to the sample file. |
 |
| iv. To import the new columns, Admin should make sure each field matches the columns in the importing file. |
 |
| v. The matched columns value will be displayed in the Preview tab. |
 |
| 1. Approval • Allow multiple selection of Overtime Type. |
|
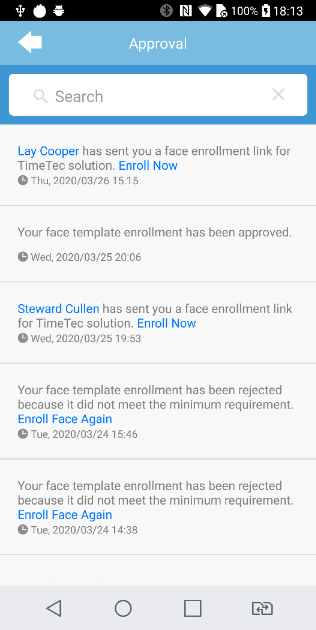
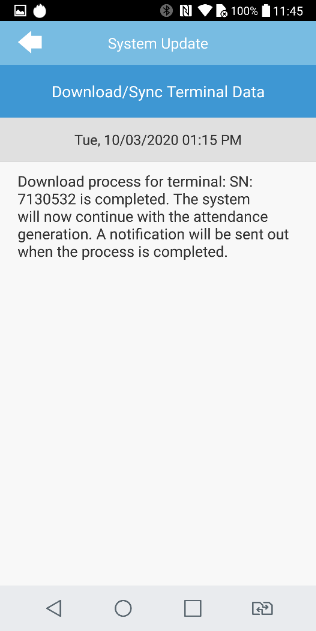
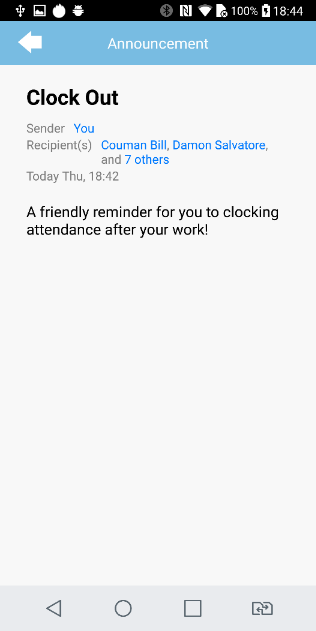
| 2. Notification • Added new notifications for Face template enrollment web link and Download/Sync Terminal Data. |
|
| • Text size adjustment. |
|
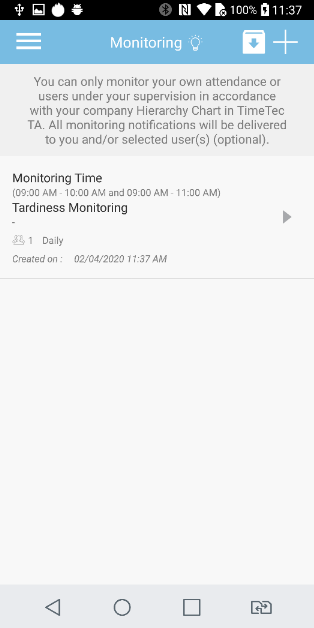
| 3. Monitoring • Text update. |
|
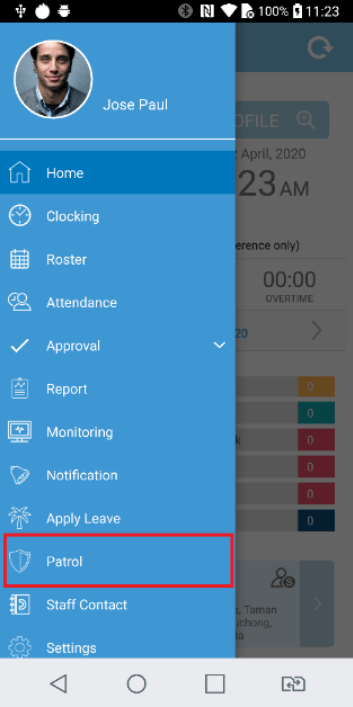
| 4. Updated Interlink with TimeTec Patrol App • Interlink only displayed to users that have also been assigned to TimeTec Patrol. |
|
| 5. Clocking • Added firebase for monitoring purpose. |
| Previous Issue: March 2020 |
| Note: If some of the screenshots or steps viewed here are different from the ones in the current system, this is due to our continuous effort to improve our system from time to time. Please notify us at info@timeteccloud.com, we will update it as soon as possible. |