 |
| Export Attendance to Payroll - SQL Payroll Enhancement |
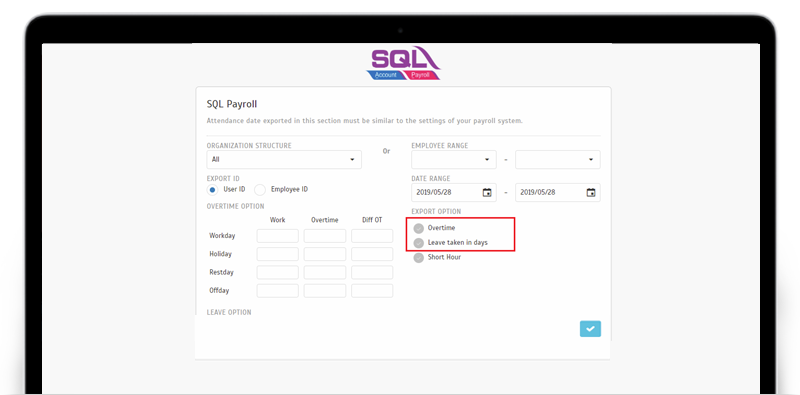
| ‘Export Attendance to Payroll’ feature provide some payroll options that allow users to directly export attendance data into an output file matching the payroll requirements. This month, we’ve updated the SQL Payroll export option, as shown in the images below. |
| a. Added new export options: ‘Overtime’ and ‘Leave taken in days’ |
 |
| b. Export file (csv) - Overtime Summary |
 |
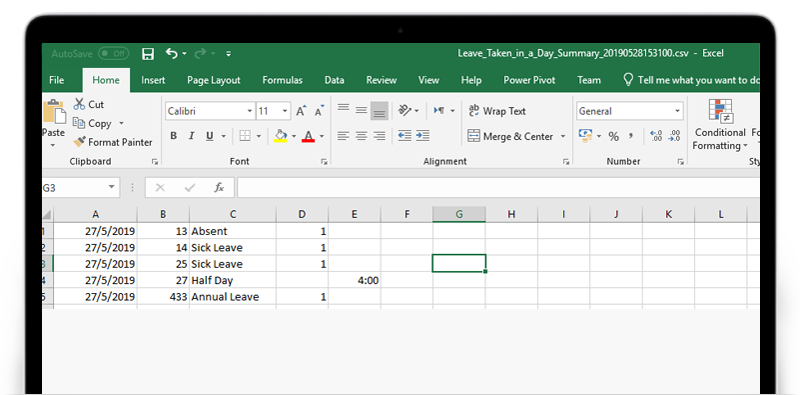
| c. Export file (csv) - Leave Taken in Days Summary |
 |
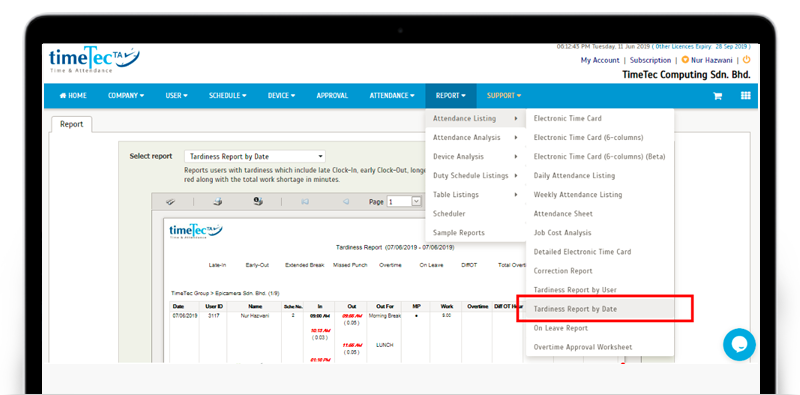
| New Report: Tardiness Report by Date |
| Next, for the Report module, we’ve introduced a new ‘Tardiness Report by Date’, with details as follows: |
| a. New Report - Tardiness Report by Date |
 |
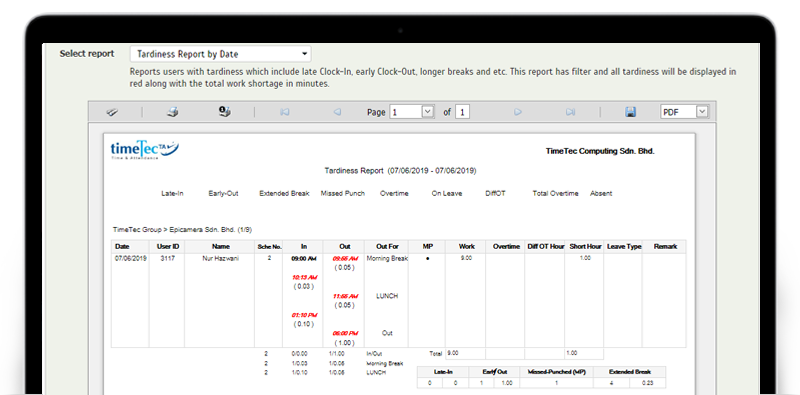
| b. Tardiness Report by Date Description: Reports users with tardiness which include late Clock-In, early Clock-Out, longer breaks and etc. This report has filter and all tardiness will be displayed in red along with the total work shortage in minutes. |
 |
| TimeTec Profile Updates |
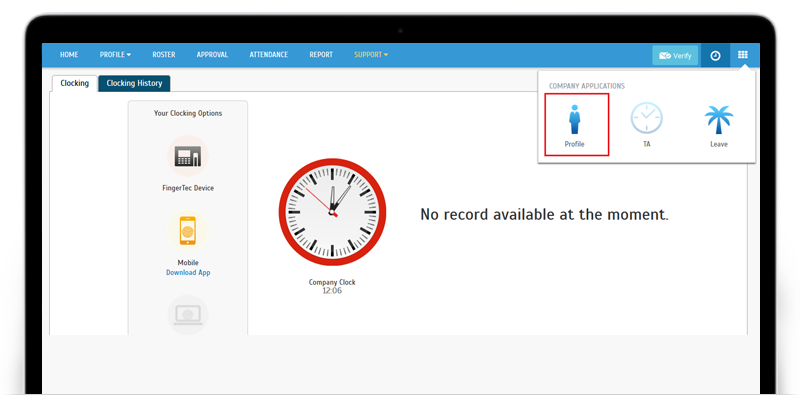
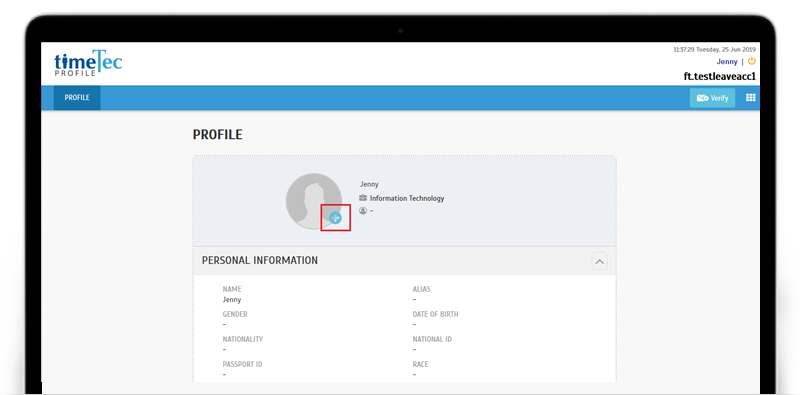
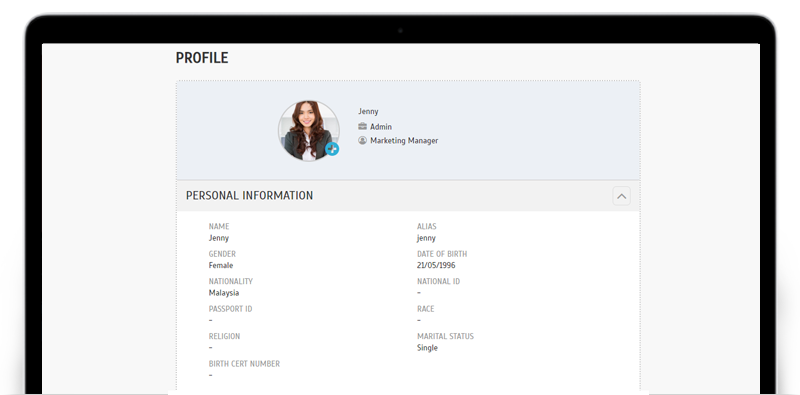
| 1. Allow normal user to Upload Profile Photo TimeTec Profile is a tool for HR personnel to centralize all employees’ information and comes as complimentary for subscribers of TimeTec solutions. While the features are more catered for HR and Admin use, normal users are also provided access so that they can view the details of their own full profile as managed by HR. Over here, we’ve just added an option that allows normal users to upload their own profile photo. For users that wish to do so, they can switch to TimeTec Profile, click on the Upload (+) icon and select the photo to upload. |
| a. Switch to TimeTec Profile (User View) |
 |
| b. Click Upload icon (User View) |
 |
 |
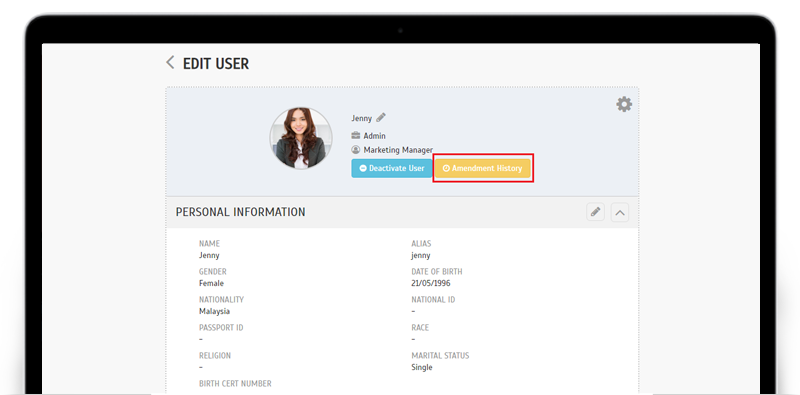
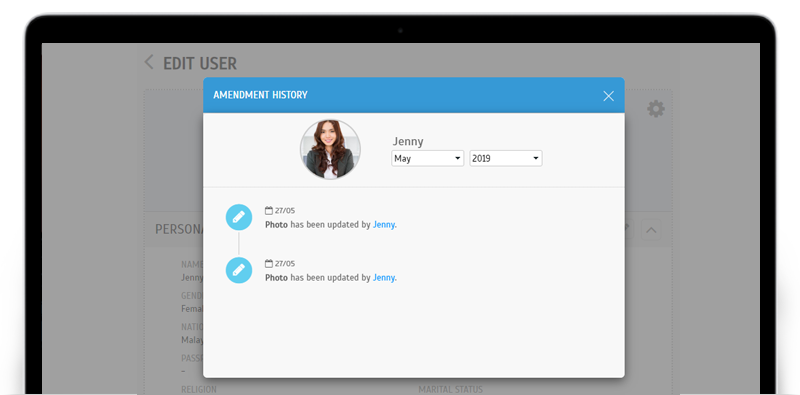
| 2. User Profile Amendment History Due to the introduction of the option allowing users to upload their own profile photo, we’ve also added Amendment History (at Edit User) so that Admin can see the history of the changes made from user’s side. |
| a. TimeTec Profile > Users > Manage User > Edit User (Admin View) |
 |
 |
| TimeTec TA Integration with i-TimeTec |
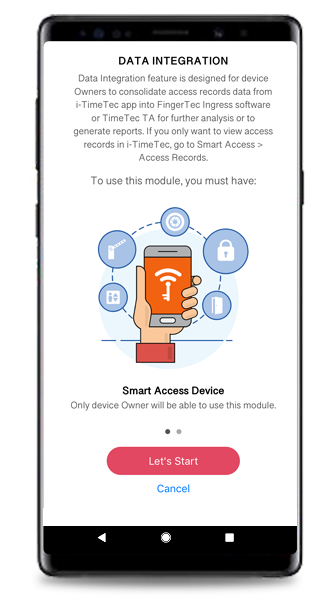
| 1. New Feature: TimeTec TA Integration with i-TimeTec This section caters to TimeTec TA subscribers that are currently using or plan to use smart access devices such as FingerTec Smart Lock or TimeTec BLE-2 door access controller with i-TimeTec App. We offer a Data Integration feature that is designed for smart device Owners to consolidate access records data from i-TimeTec app into TimeTec TA for further analysis or to generate reports. |
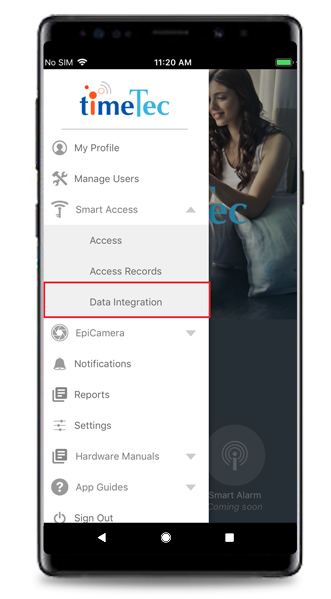
| If you need to integrate the data from those devices with TimeTec TA, you can start by initiating the connection using i-TimeTec App through the steps below: i. Log in to the App (as device owner) > Go to Menu > Smart Access > Data Integration. |
| Refer to the screenshots below for more details: |
| i-TimeTec App |
| a. Side Menu – Smart Access > Data Integration |
 |
| b. Data Integration Guide |
 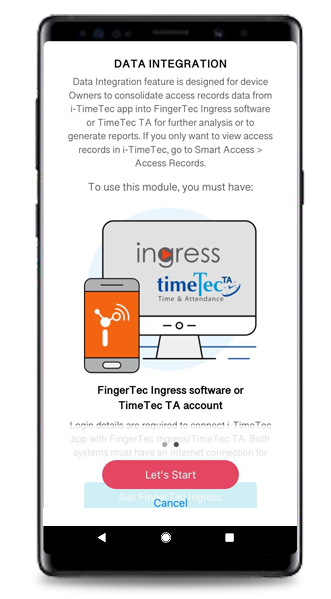 |
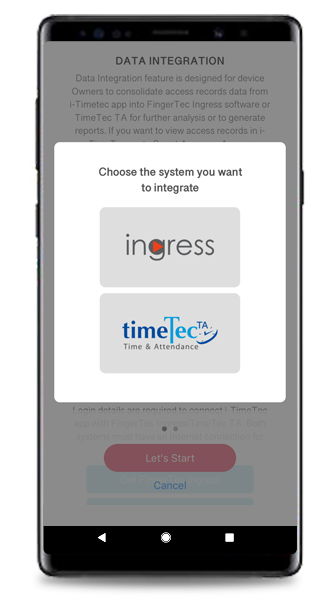
| c. Select TimeTec TA |
 |
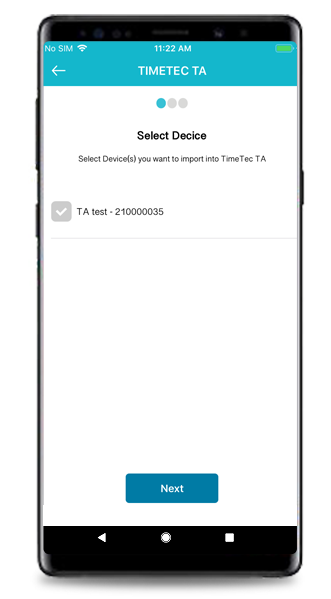
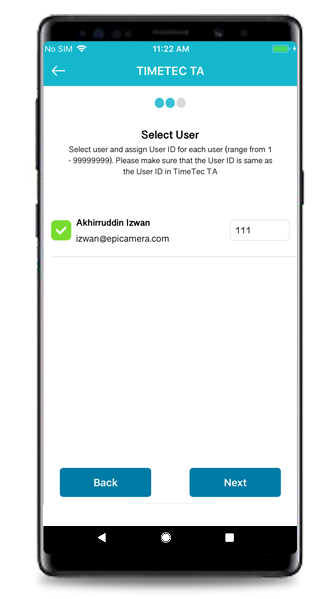
| d. Select the Device & User |
  |
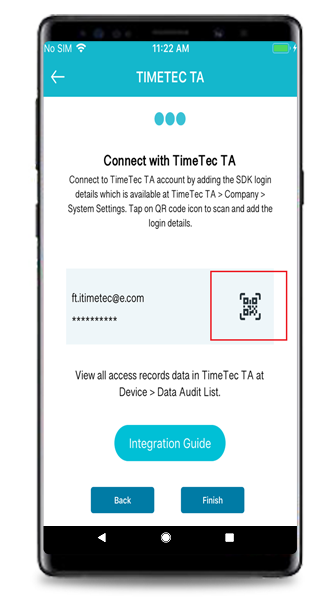
| e. Add TimeTec TA SDK login details (Tap on QR code icon to Scan) & Finish |
 |
| TimeTec TA (Web) |
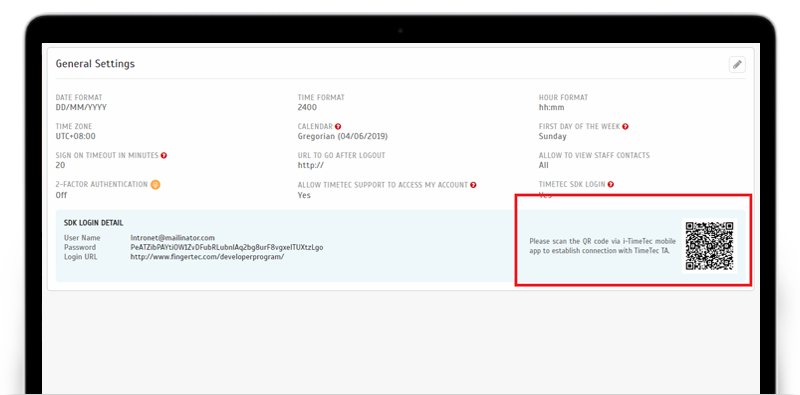
| a. Admin can scan the QR code in General Settings to sync their i-TimeTec account with the current TA account |
 |
| b. User > Manage User i. New users added in i-TimeTec will be synced with TimeTec TA |
 |
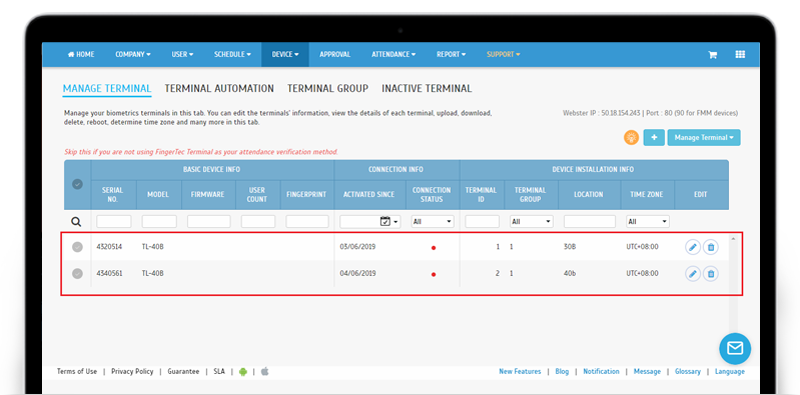
| c. Device > Fingertec Terminal > Manage Terminal i. Terminals that are added from i-TimeTec will be displayed on this page |
 |
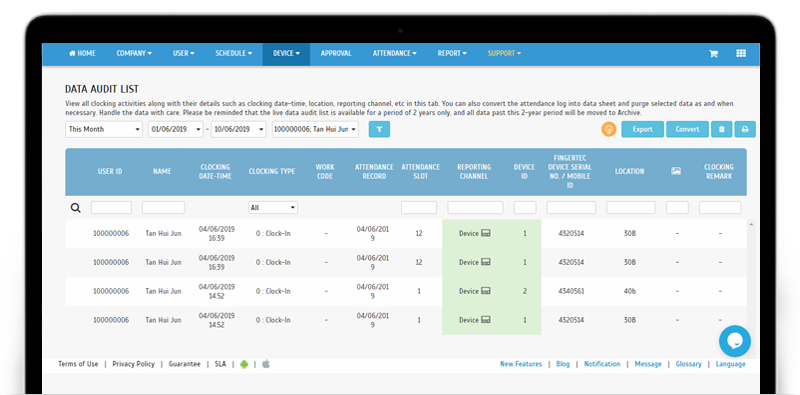
| d. Device > Data Audit List i. Data Audit List will be generated based on the access logs sent from i-TimeTec |
 |
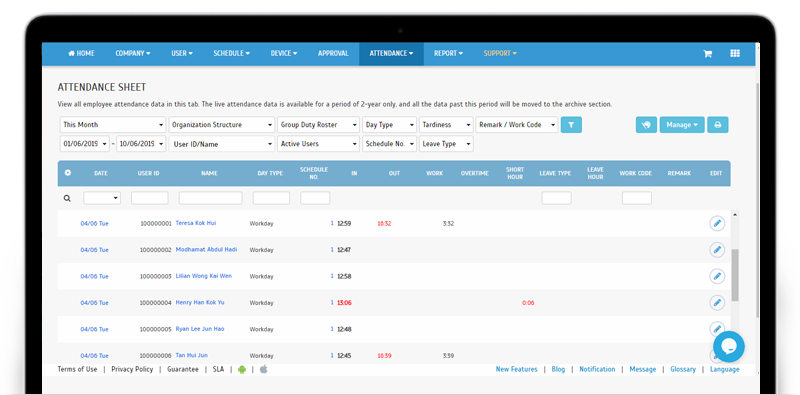
| e. Attendance Sheet i. Attendance will be generated based on the access logs sent from i-TimeTec |
 |
| Other TimeTec TA Updates |
| 1. Optimization on Schedule Listing Page | |
|
TimeTec TA App Update
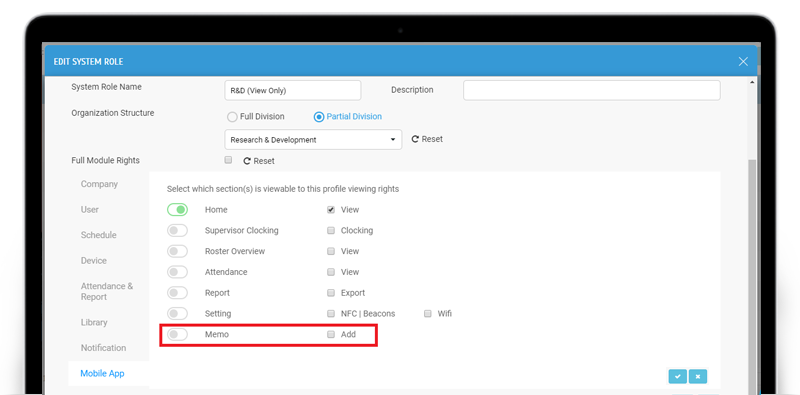
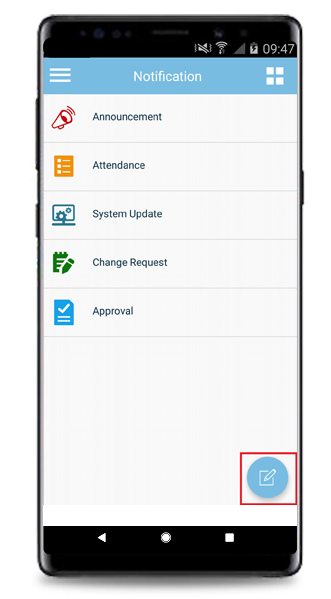
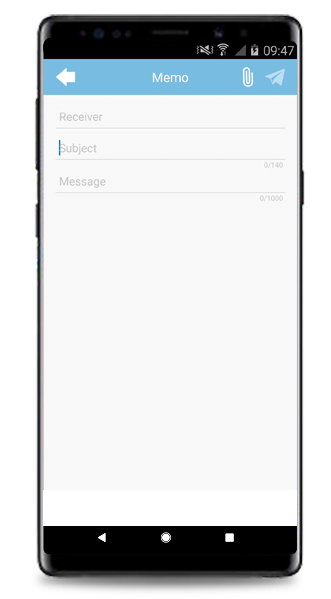
1. Memo
|
|
| In TimeTec TA, there is a function which allows Administrators to construct a Memo (brief message) and set the date and time to send the memo to all TimeTec users. This function was available for all Admins but after this release, the access rights can now be controlled at System Role settings. | |
 |
|
  |
|
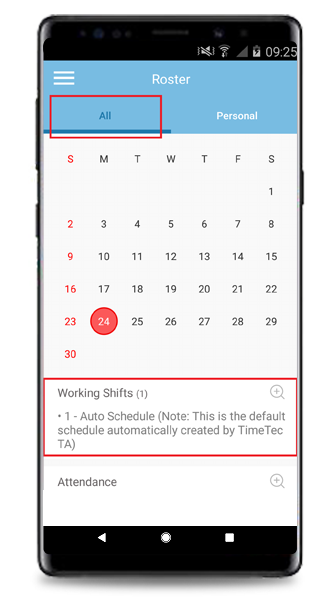
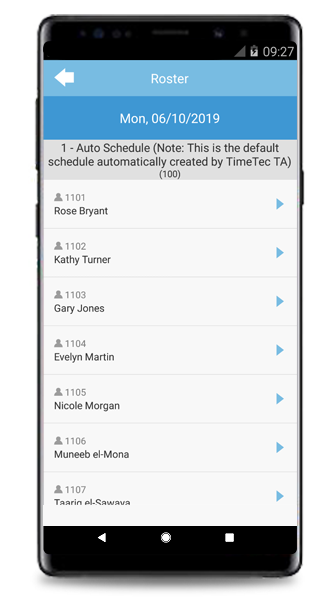
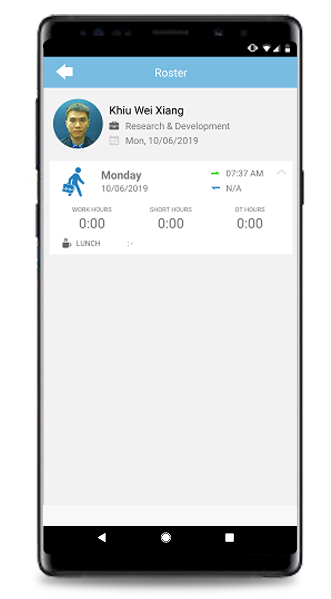
| 2. Roster Overview Admin view roster of all users- Standardized the Attendance UI with Attendance Module. | |
  |
|
  |
|
| 3. Notification Attendance listing optimization for Clocking Monitoring. |
| Previous Issue: May 2019 • April 2019 • March 2019 |
| Note: If some of the screenshots or steps viewed here are different from the ones in the current system, this is due to our continuous effort to improve our system from time to time. Please notify us at info@timeteccloud.com, we will update it as soon as possible. |