 |
| Restrict Display of “Personal Contact No.” |
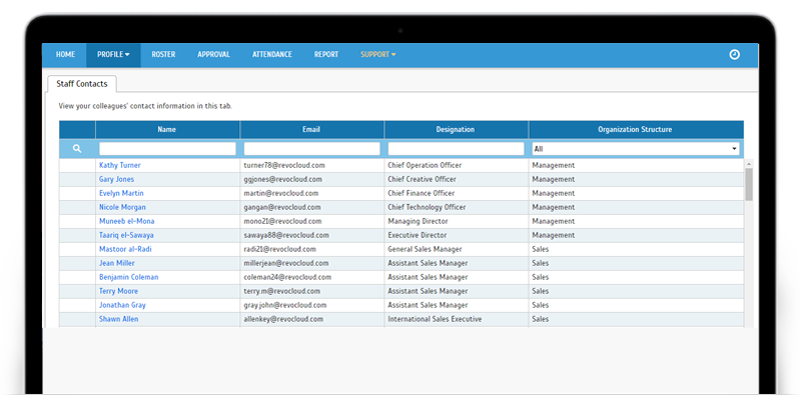
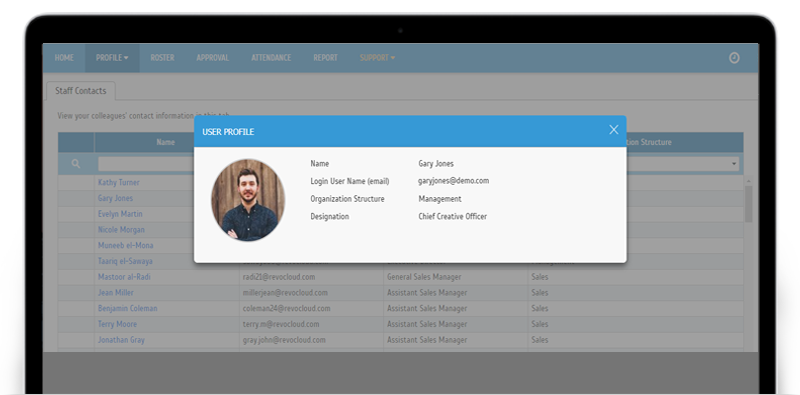
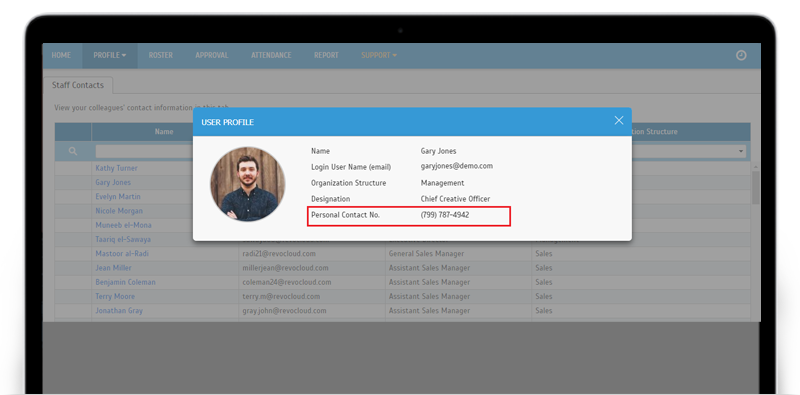
| For privacy or company policy purposes, the HR Department may not want to share the “Personal Contact No.” of each staff member with everyone else in the company. Therefore, in the November’s release, we’ve made some changes to limit the display of the “Personal Contact No.” field, as described below: |
| a. Removed "Mobile Contact" column from the Staff Contacts table |
| User Login: Profile > Staff Contacts |
|
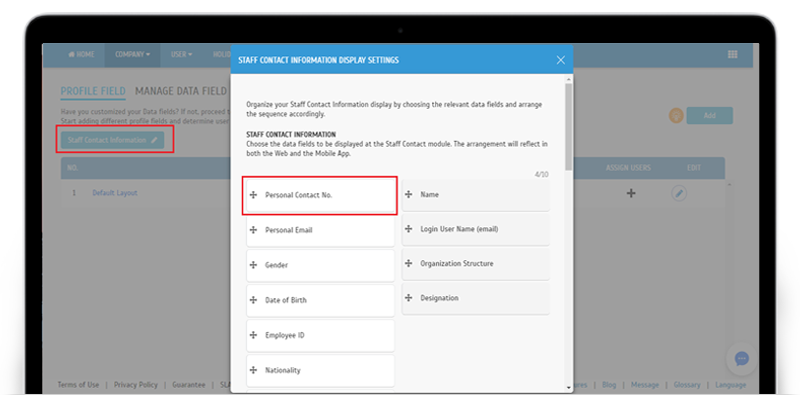
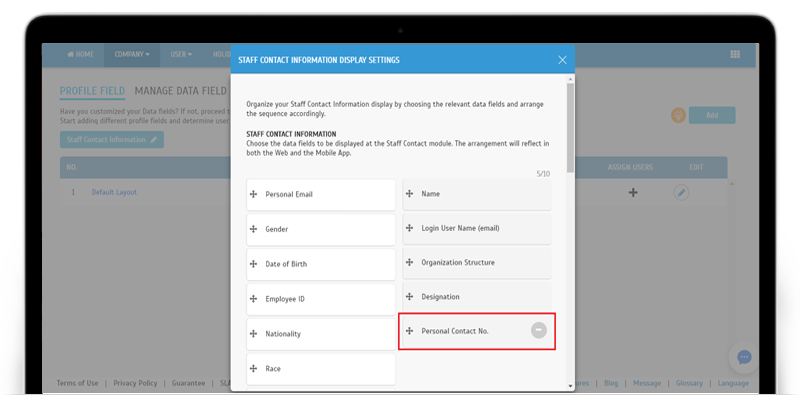
| b. Changed "Personal Contact No." field to Optional |
| Admin Login: Company > Profile Field > Staff Contact Information |
| At the ‘Staff Contact Information Display Settings’ pop-up, you can select which data fields from the users’ profiles to display in both the Web and Mobile App. Previously, "Personal Contact No." was a compulsory field and now, this profile field has been set to optional; drag the field to the right column to display it in Staff Contacts. |
|
|
|
|
| New Batch Update function for ‘Change User Time Zone’ |
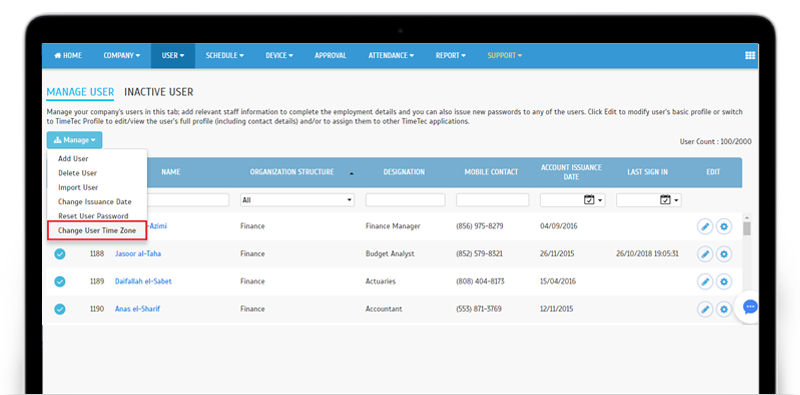
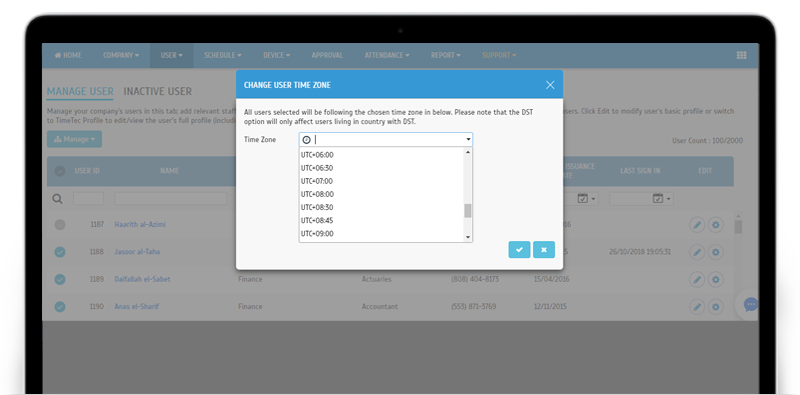
| Next, we have a new function that allows you to batch update users’ Time Zone settings. By default, the ‘Time Zone’ for all users added into your account is based on the configuration in the System Settings. If there are groups of employees operating in a different time zone; for instance in a regional office, you can easily update the time zone by first selecting all the relevant users, then choosing Manage > Change User Time Zone. Please refer to the screenshots below for more details of the changes. |
| a. Change User Time Zone in batch |
 |
 |
| Import User - New download file for Manual Activation Password |
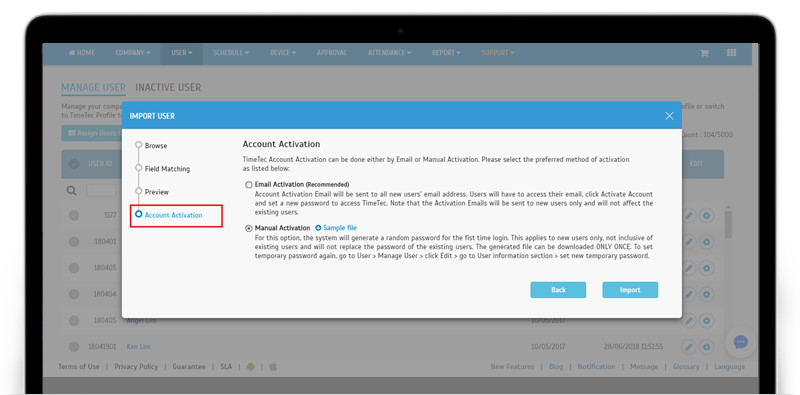
| In TimeTec application, there are different ways for you to create new users, such as ‘Add User’ (add individually) and ‘Import User’ (batch import with .txt or .xlsx file). If you are using the ‘Import User’ function, we’ve recently added the option where Admins can select activation method for the newly imported user accounts. Here, we recommend Email Activation but if you prefer to proceed with Manual Activation, note that you can download the User Temporary Password file and send these credentials to the users later. Go to User > Manage User > Import User to view this latest update. Details of the changes are as follows: |
| i. Import User - New Account Activation tab |
| ii. Account Activation tab - 2 options: |
| Email Activation - Activation email will be automatically sent to new users' email address. |
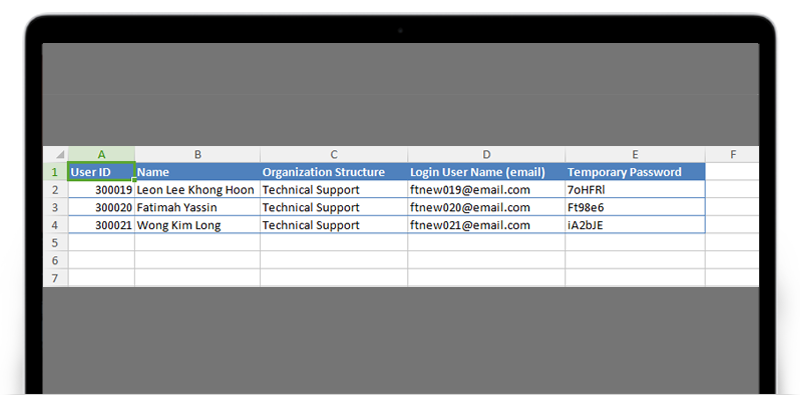
| Manual Activation - Password will be randomly generated for new users and stored in the Excel file (.xlsx) for Admin to download. Please note that the file can be downloaded only Once. |
| a. Import User- New Account Activation tab |
 |
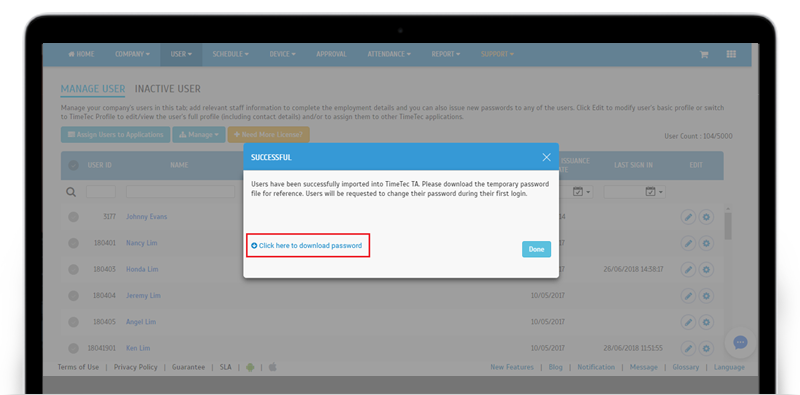
| b. Successful Pop-up |
| Click to download User Temporary Password file. |
 |
 |
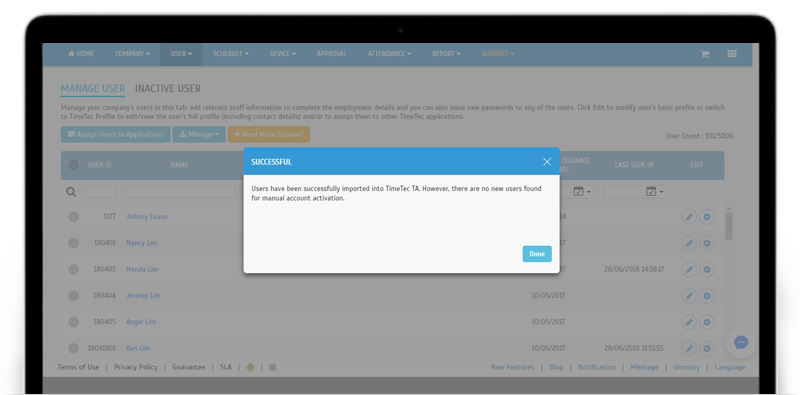
| c. Inform Admin if no new user for Manual Activation |
 |
| Leave Type - Added Leave Code |
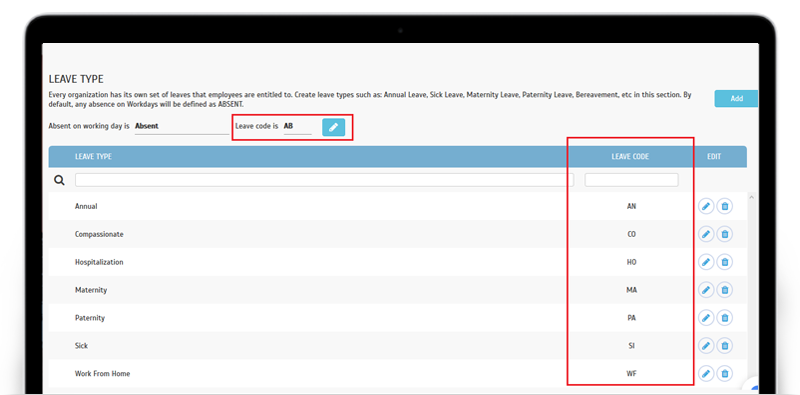
| In order to provide more information regarding leaves in selected reports such as the ‘Monthly Staff Duty Roster’, we’ve added Leave Code in the Leave Type page. Each Leave Type is now represented by a short code (2 character limit) which will be displayed in the relevant reports where space is limited. The changes made are as shown below: |
| a. Added Leave Code for each Leave Type |
 |
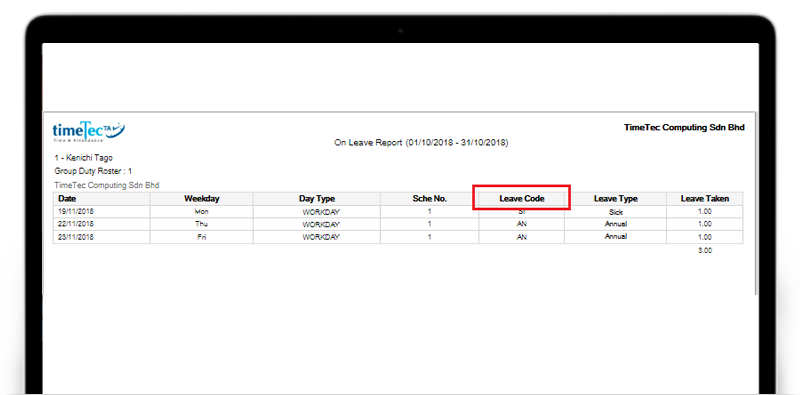
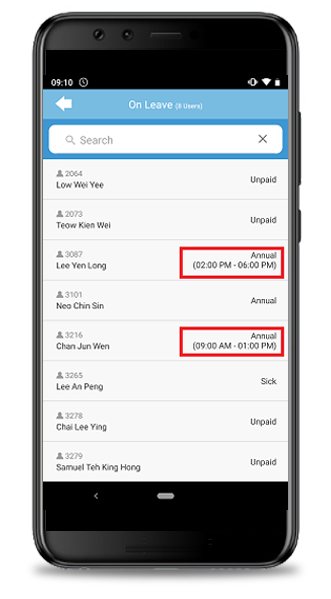
| b. Display Leave Code in ‘On Leave Report’ |
| Go to Report > Attendance Listing > On Leave Report. |
 |
| TA Wizard: Added default Approval Rules |
| If you’re a new TimeTec TA Admin, your first stop in the system will usually be the Setup Wizard, which is designed to guide you through the account setup process. In November, we’ve enhanced the TA Wizard by incorporating another tab for our newly created default Approval Rules. Following this, you can now enable the default settings for Edit Attendance Approval and Overtime Approval if you find them suitable for your requirements. It’s also important to note that when you choose to enable them, “All users” will be allowed to edit their Attendance details and submit Overtime requests. However, if these rules don’t match your criteria exactly, note that the default settings (e.g. users, approvers and etc.) can always be viewed and edited at User > Manage Approval Rules. Some of the basic details are as follows: |
| i. Edit Attendance Approval |
| Users: All Default Approver: Any Master Admin Validity Period: 30 days |
| ii. Overtime Approval |
| Users: All Default Approver: Any Master Admin Validity Period: 30 days |
| a. Added default Approval Rules in TA Wizard (Support > Wizard > TA Wizard) |
 |
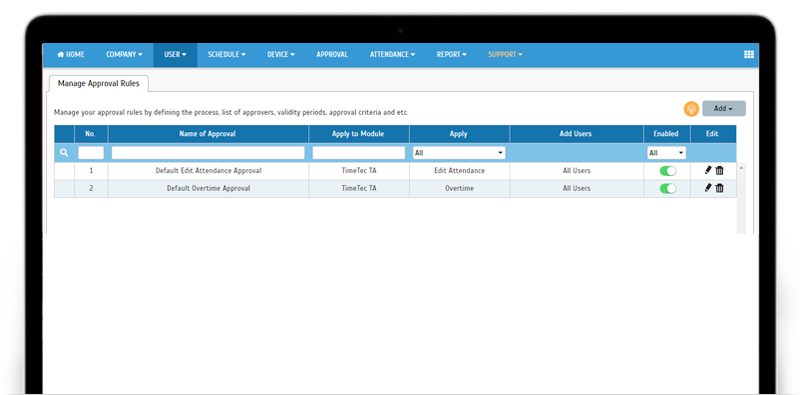
| b. Default Rules created at Manage Approval Rules |
| Click Edit to customize the process, users, approvers, validity period and etc. |
 |
| Enhancement of Attendance Sheet (Admin View) |
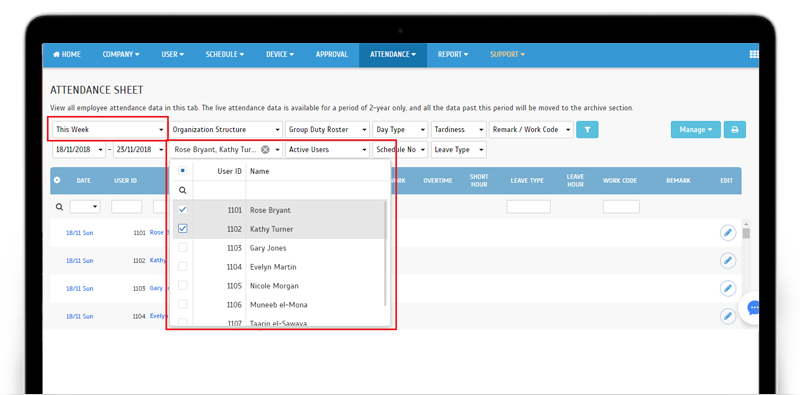
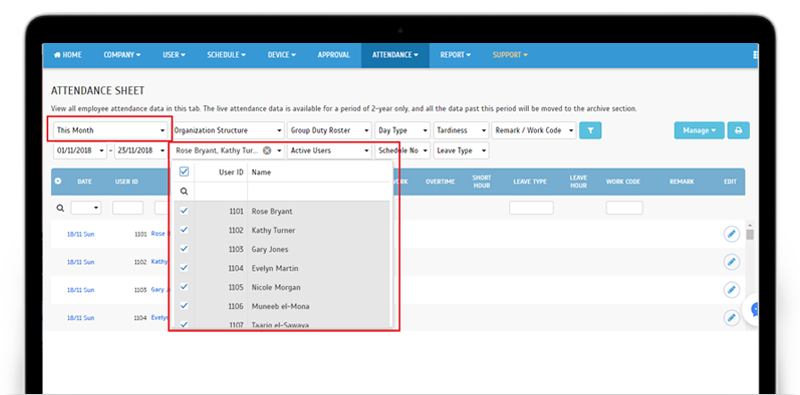
| Next, we’ve also improved information filtering in Admin View of Attendance Sheet by introducing a new filter for ‘User’. Now, attendance data will be displayed for the full user listing if you have selected to view by Today / Yesterday / This Week / Last Week. Additionally, you can also narrow down the results by picking just one or multiple users from the User filter. To maintain optimal loading, for longer time periods such as This Month / This Payroll Cycle / Last Payroll Cycle, you must select the relevant user(s) before clicking Filter button to retrieve the attendance data. |
| a. Added new filter for Admin’s Attendance – Allow to select multiple users Example: This Week |
 |
| Example: This Month |
 |
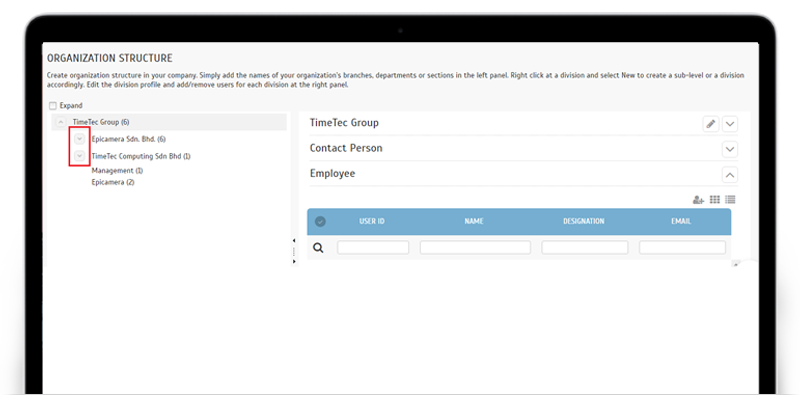
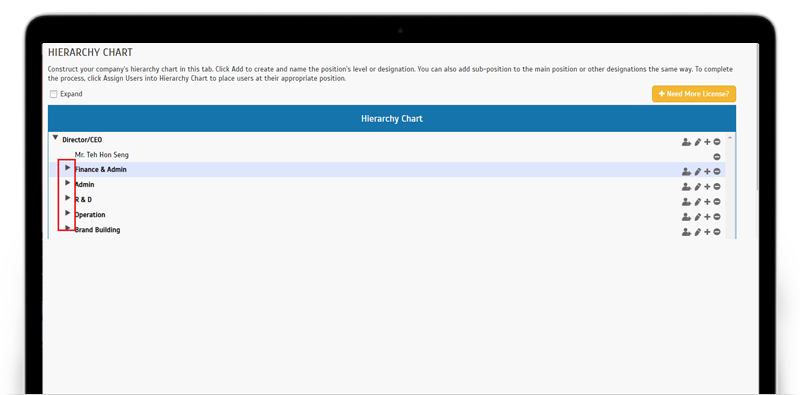
| Improved UI for Organization Structure & Hierarchy Chart |
| Our next update is on the UI for Organization Structure and Hierarchy Chart, where we’ve tweaked the design to show the first level division only by default. This helps to reduce visual clutter and improve navigation, especially if you have to find one particular division among a long list. |
| a. Added Expand option in Organization Structure Click on the expand arrow to view subdivisions. |
 |
| b. Hierarchy Chart |
 |
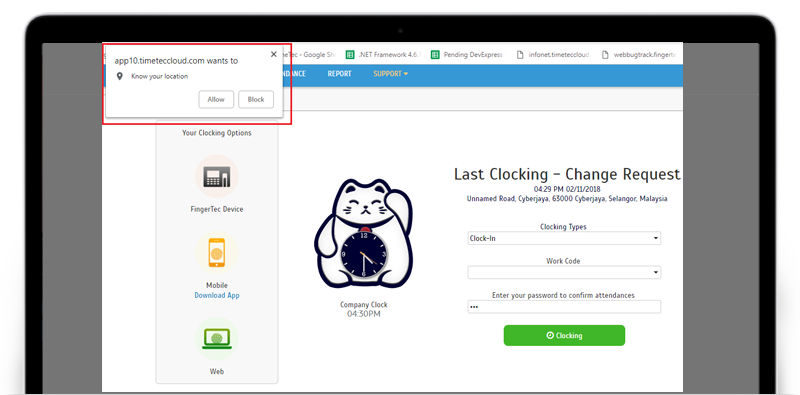
| New Feature: Web Clocking with Geolocation |
| In November, we also released a feature which will now enable users to carry out Web Clocking complete with Geolocation data. This sharing of location is implemented through the HTML5 Geolocation API, which uses location services provided by your browser to determine where you are. If your device has built-in GPS (e.g. mobile phone), the location obtained will be highly accurate. On the other hand, if you are using a desktop PC without GPS, it will still provide a good approximation of your actual location by using local wireless network signals, cell tower IDs and IP addresses. However, since this can compromise privacy, the location data will not be available unless the user approves it. This means that while clocking, you need to accept ‘yes’ on a pop-up that asks for permission to find your location. Please refer to the screenshots below for more details. |
| i. Allow your Geolocation to be shared in the application |
 |
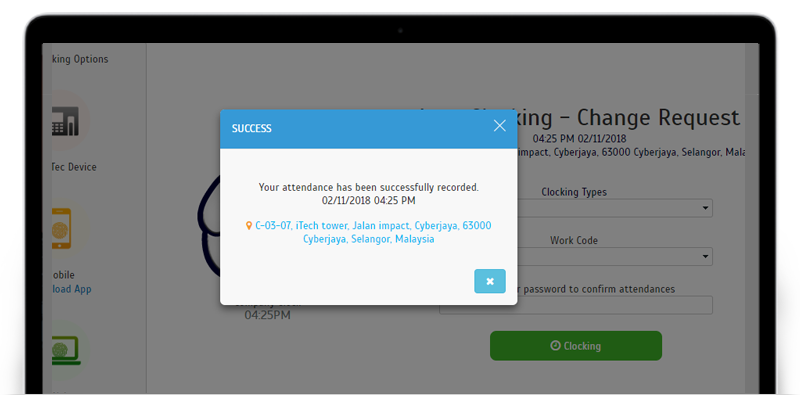
| ii. Web Clocking Successful |
 |
| Report Updates: Overtime Approval Worksheet & Tardiness Report |
| Following user’s feedback, we’ve made some changes for the above mentioned reports. Please refer to the screenshots below for the updates. |
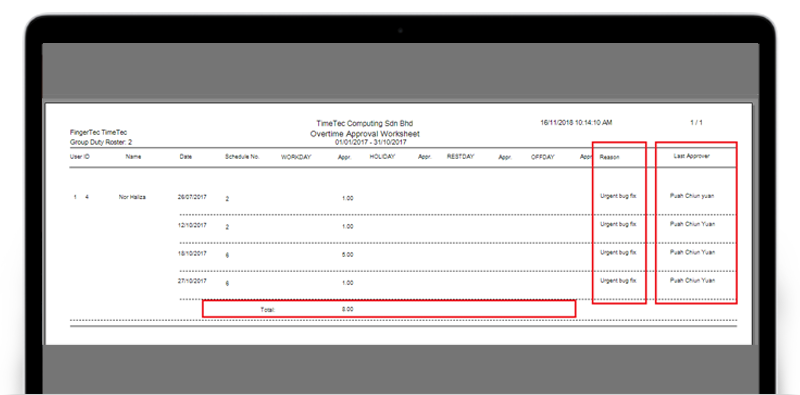
| a. Overtime Approval Worksheet |
| i. Added Overtime Request Reason, Total OT Calculation and Last Approver Name. |
 |
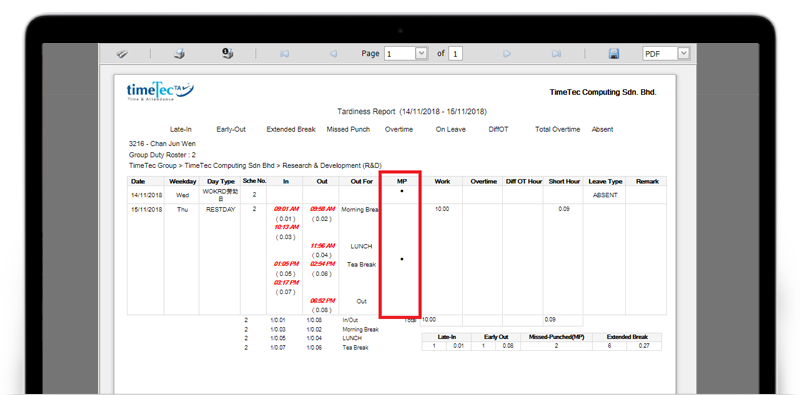
| b. Tardiness Report |
| i. Added new column MP (Miss Punch), after Out For, to indicate if certain day has Missed Punch. |
 |
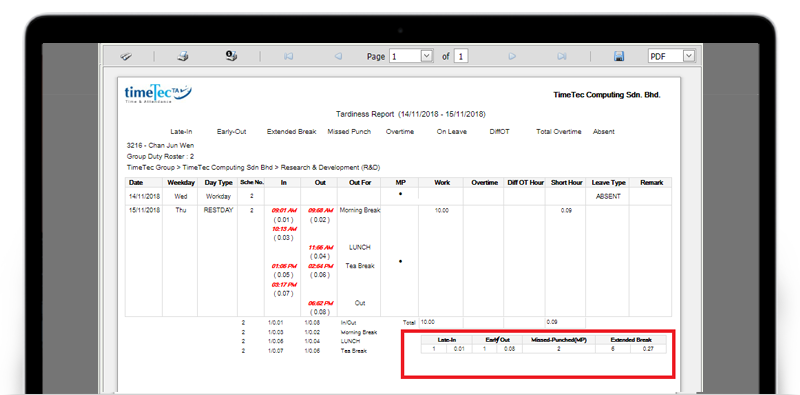
| ii. Added a summary table to show occurrence and total time of Late-In, Early-Out, Missed Punch (MP), Extended Break. |
 |
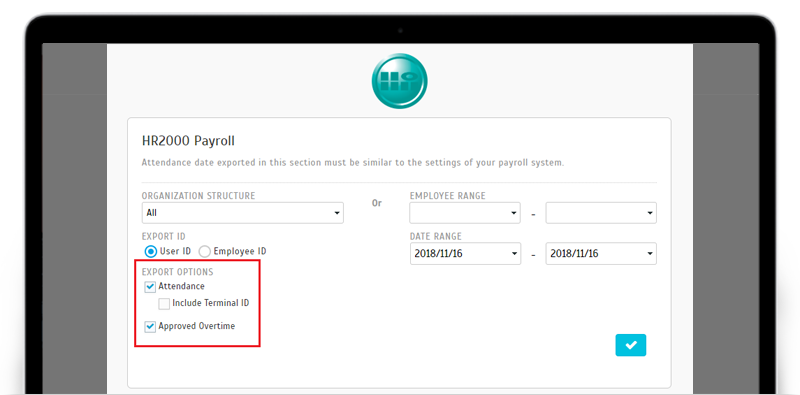
| Export Attendance to Payroll - HR2000 Payroll Enhancement |
| ‘Export Attendance to Payroll’ feature provide payroll options that allow users to directly export attendance data into an output file matching the payroll requirements. This month, we’ve updated the HR2000 Payroll export option, as shown in the images below. |
| a. Added ‘Attendance’ and ‘Approved Overtime’ export option |
 |
| b. Export file - Attendance include Terminal ID |
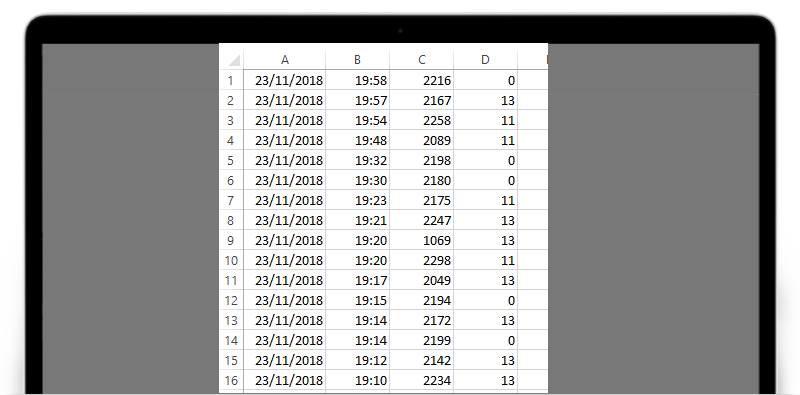 |
| c. Export file - Attendance without Terminal ID |
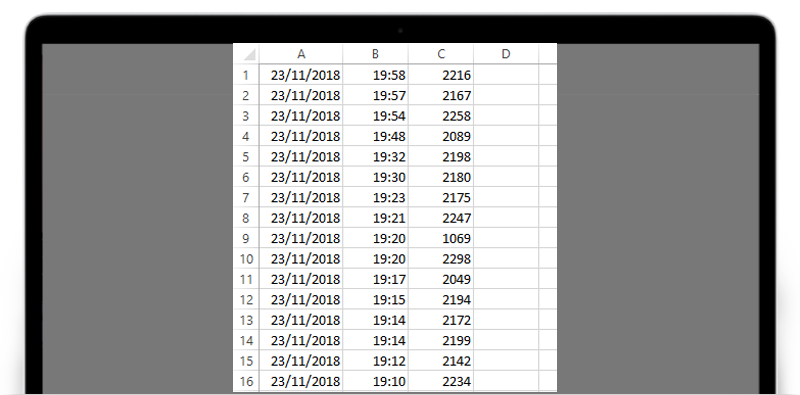 |
| d. Export file - Approved Overtime |
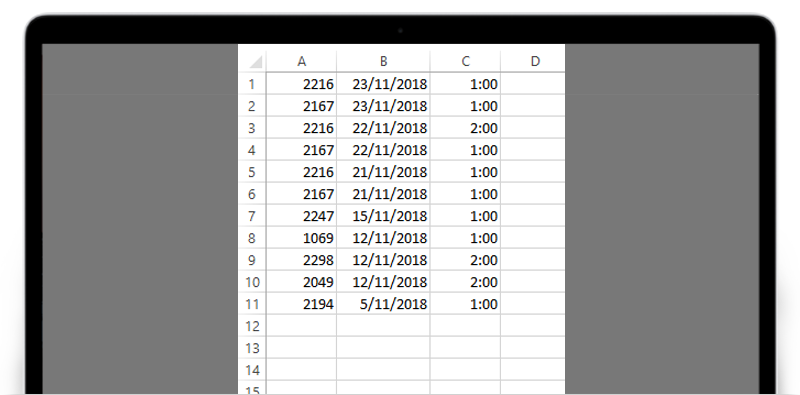 |
| Other Updates |
| 1. Dashboard Optimization on first load - Removed unnecessary script for first load. |
| 2. Translation update: |
| i. Simplified Chinese |
| ii. Traditional Chinese |
|
TimeTec TA App Update
1. Home |
 |
|
2. General |
|
b. Select / Assign User function |
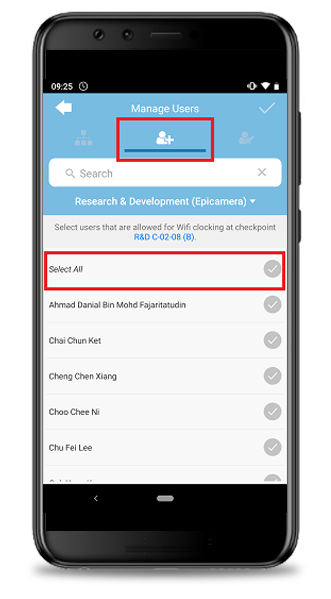 |
| c. Implementation of App Update Control |
| i. Optional Update |
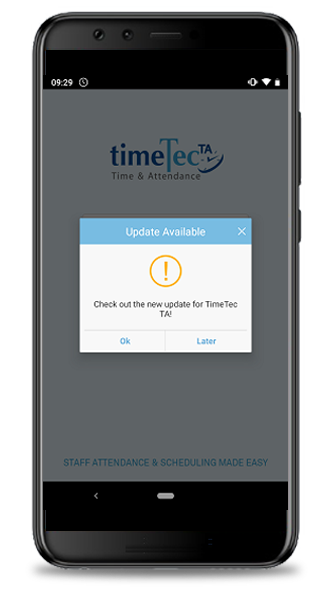 |
| ii. Compulsory Update |
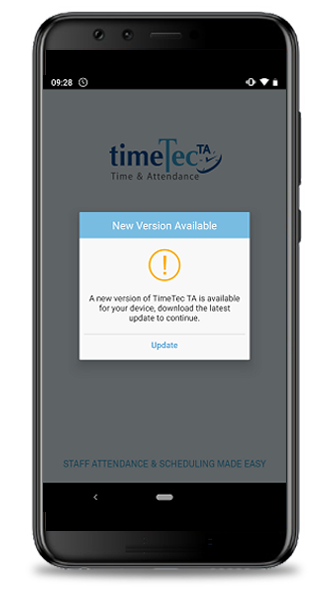 |
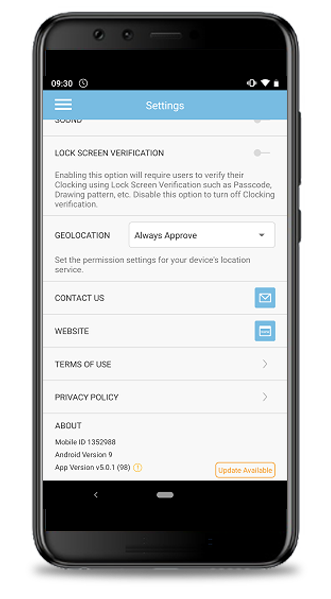
| iii. Indication in Settings page |
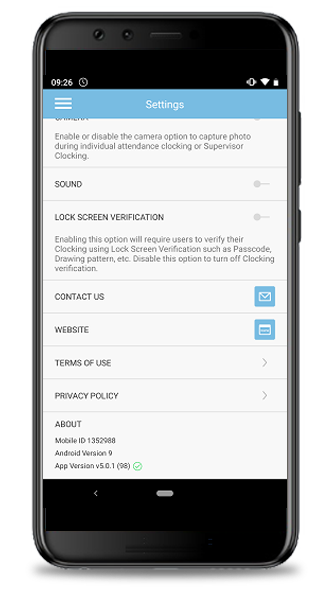  |
|
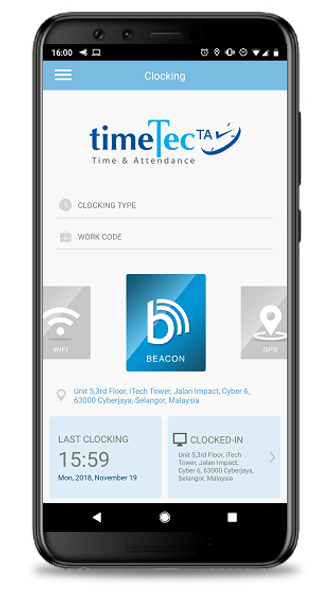
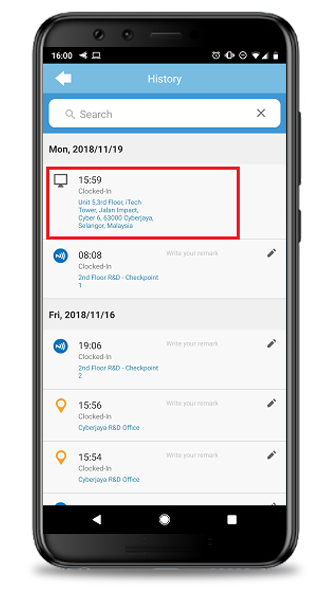
d. Web Clocking |
| As mentioned in the Web features section above, users can now choose to provide their Geolocation data in the process of performing Web Clocking through browser. This Location address will be displayed on relevant screens, where available. Please refer to the section above for more explanation on this new feature. |
  |
| Previous Issue: Oct 2018 • Sep 2018 • August 2018 |
| Note: If some of the screenshots or steps viewed here are different from the ones in the current system, this is due to our continuous effort to improve our system from time to time. Please notify us at info@timeteccloud.com, we will update it as soon as possible. |